Connecting with Nest
With the EVRYTHNG Platform configured, we now move on to connecting the two clouds. To do this, we provide a mechanism to link both clouds, called a Nest Connector. This connector needs to be created for the EVRYTHNG application that you defined in your project. Let's see how we set it up.
## Configure a Nest Product inside Nest Developer Portal
In order to create the Nest Connector you will need to create a Nest Product in a Nest developer account. This will allow EVRYTHNG to access your Nest Devices (more information on how to define this Nest Product can be found here).
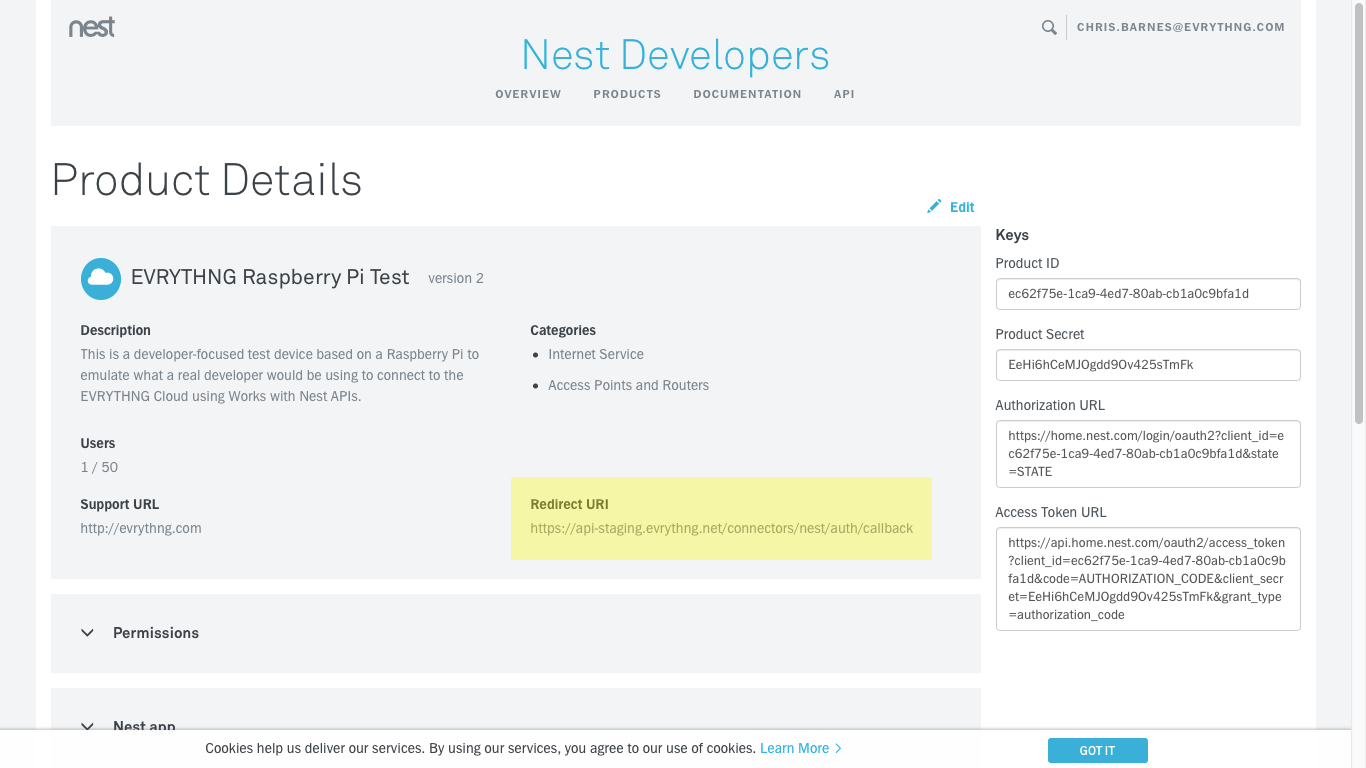
When you are doing this, you'll want to note two particular items on the Edit Product screen:
-
The 'Redirect URI', used by Nest to send the authorization token back to EVRYTHNG, has to configured as:
https://api.evrythng.com/connectors/nest/auth/callback/worksWithNest

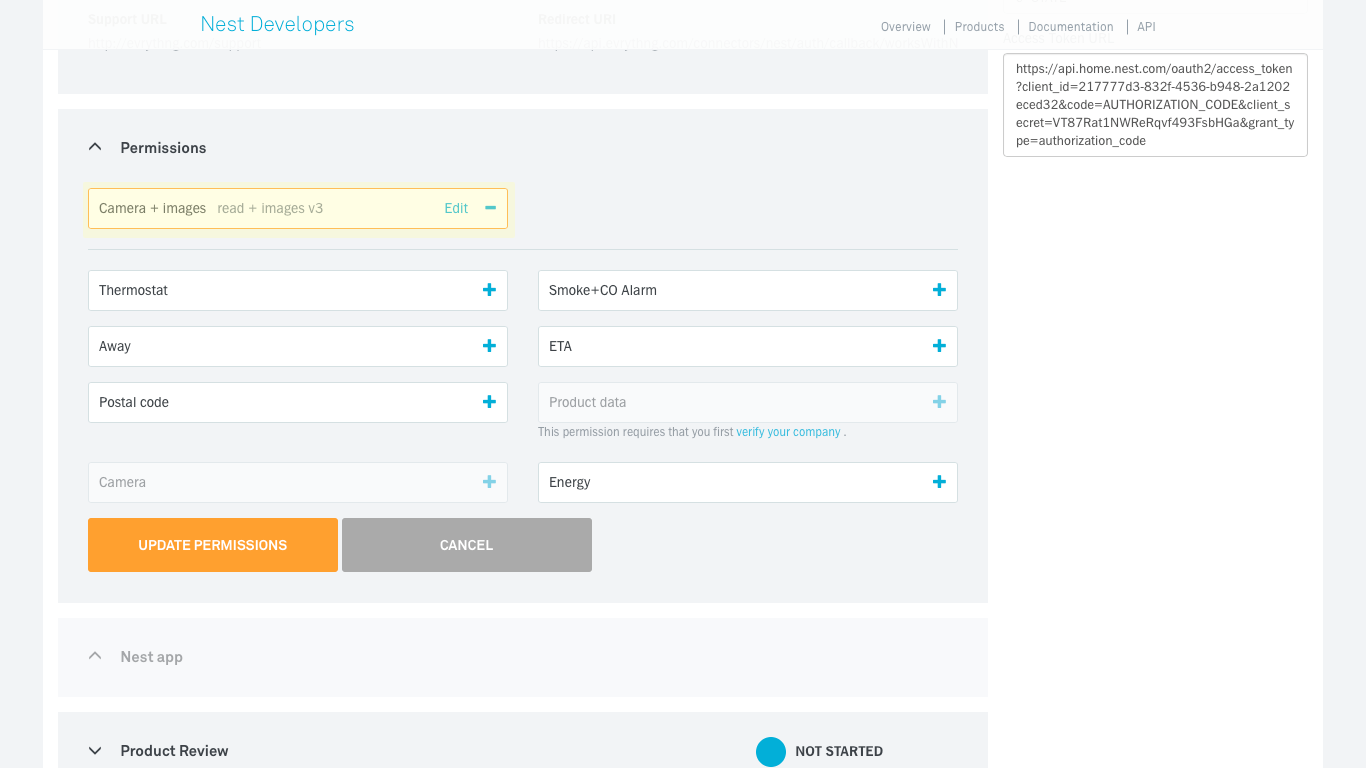
- The 'Permissions' to access the Nest devices need to be granted by the user. You need to configure your Nest Product to provide access to your devices and information. In this walkthrough, you will want to only select the Camera + Images read permission to be requested.

NoteTake note of the Product ID and Product Secret, we will be using them later.
Find your Operator API Key
As we went through this tutorial, we have being collecting a number of keys and IDs to configure the connection between Nest and the EVRYTHNG Platform. To finalise the connection you will need additionally your Operator API key, as it lets you send commands to the EVRYTHNG Platform via its REST interface.
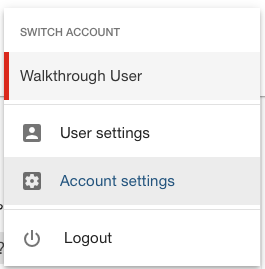
To do this, go back to the EVRYTHNG Dashboard, open the menu on the top right of the page, and select 'Account Settings':

This shows you the details of your account. At the top of the page, take note of the API key you find. This is your Operator API key, and will be used below in the REST calls we will be making.

ImportantThis key is unique to your login, so keep it secure, and don't share it with other EVRYTHNG users.
Define a Nest Connector Data Model
The Nest Connector defines the mapping between data in the EVRYTHNG Platform and Nest Home. This is done by creating a data model that defines the mapping for each device. Although you could potentially customize this to support specific properties in specific Nest devices, we’ve provided a default model that maps all the available Nest devices. It can be automatically configured by passing the “default” option as shown below.
You can find more information about this mapping here.
Here’s what the model looks like (you need to add the 'Product ID' and 'Product Secret' created in your Nest Product before):
{
  "name": "nest",
  "auth": {
    "clientId": "Product ID",
    "clientSecret": "Product Secret"
  },
  "model": "default"
}
Create the Nest Connector
Now we’re ready for all those IDs we’ve been reminding you about. To create the Nest Connector for your EVRYTHNG application, you need:
:projectId- The ID of your project in EVRYTHNG.:applicationId- The ID of your application in EVRYTHNG.$OPERATOR_API_KEY- This is the key of your EVRYTHNG account.- 'Product ID' and 'Product Secret' of the Nest Product you are using - these came from the Product Page at workswith.nest.com.
Use your REST tool to POST the following data to https://api.evrythng.com:
POST /projects/:projectId/applications/:applicationId/connectors
Authorization: $OPERATOR_API_KEY
Content-type: application/json

{
  "name": "nest",
  "auth": {
    "clientId": "Product ID",
    "clientSecret": "Product Secret"
  },
  "model": "default"
}
If your receive a 201 Created message in return, you’re all set! This will enable a Nest Connector with that model and product in your application. If you get a 400-class error, check the POST call response for errors.
## Connect Your EVRYTHNG User with Your Nest Account
To connect your EVRYTHNG user with your Nest account and be able to work with your Nest devices through the EVRYTHNG Platform, you need to grant access to your Nest devices.
To perform this authorization, which is based on OAuth, you will need to open a browser window and navigate (passing the EVRYTHNG User API key) to the following URL:
https://api.evrythng.com/connectors/nest/auth?access_token=<user api key>
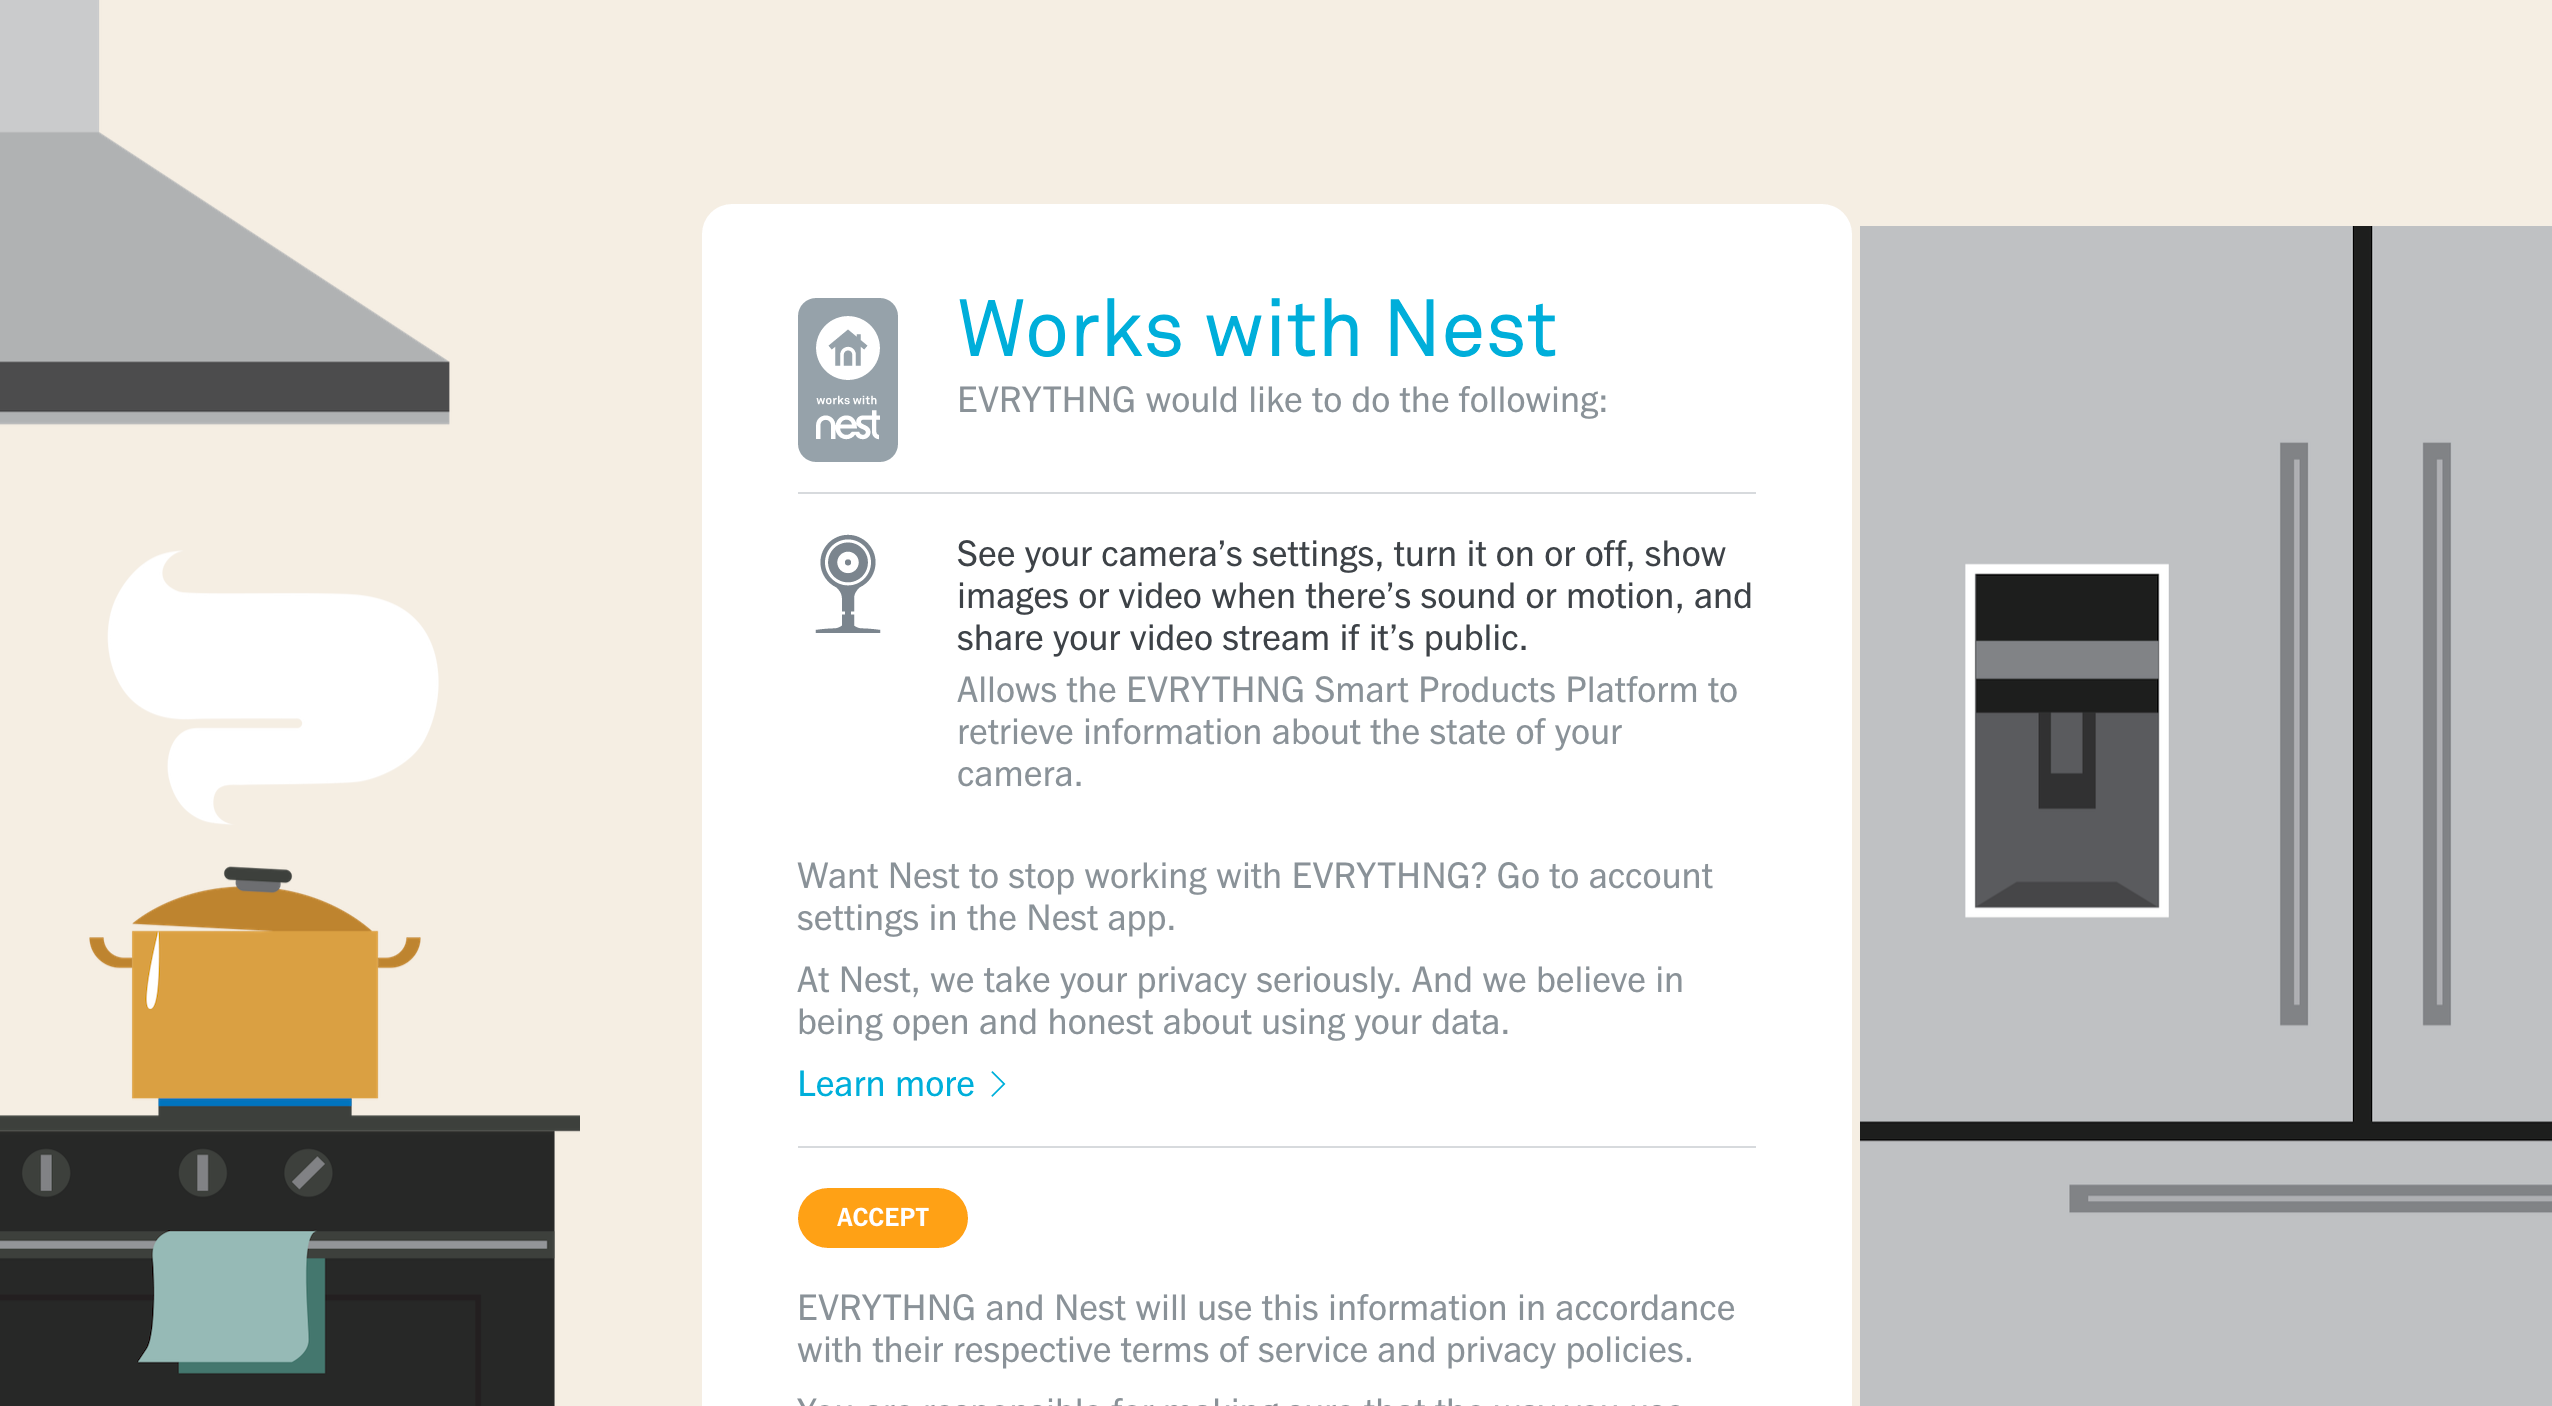
You should then see a page where Nest will ask users to confirm that they are granting access to the application:

If the access is granted and the process executed successfully, the page will be redirected to:
https://api.evrythng.com/connectors/nest/auth/result.html?status=ok
Otherwise it will be a status error:
https://api.evrythng.com/connectors/nest/auth/result.html?status=err
After this process has been successful, the Nest devices will be connected to EVRYTHNG and available in the user's account.
Verify Your EVRYTHNG Account is Connected to Nest
You can double-check that your account is connected to Nest by doing a GET request on the Nest connector with the EVRYTHNG Application User API key. Among other fields you will see the status field that indicates whether the connection was successful.
GET /connectors/nest
Content-type: application/json
Authorization: $APPLICATION_USER_API_KEY{
"name": "nest",
"status": "connected",
...
}Alternatively, you should also now be able to see the Nest Devices in the EVRYTHNG Platform. Sign into your EVRYTHNG account, select the project and click on ‘Thngs’ in the side navigation. You should see the Nest Devices in your list of Thngs.
OK, we have now linked both clouds, and can move on to configuring the Raspberry Pi.
Updated 8 months ago
