Testing Actions and Users
For testing, you can create actions and users directly on the Dashboard. Click Testing in the left navigation pane. The Testing page opens with two tabs, one for creating each type of test resource.
NoteCreating actions and users by this method isn't recommended for long-lived production resource creation. Use the REST API or equivalent sections of the Dashboard instead.
Actions
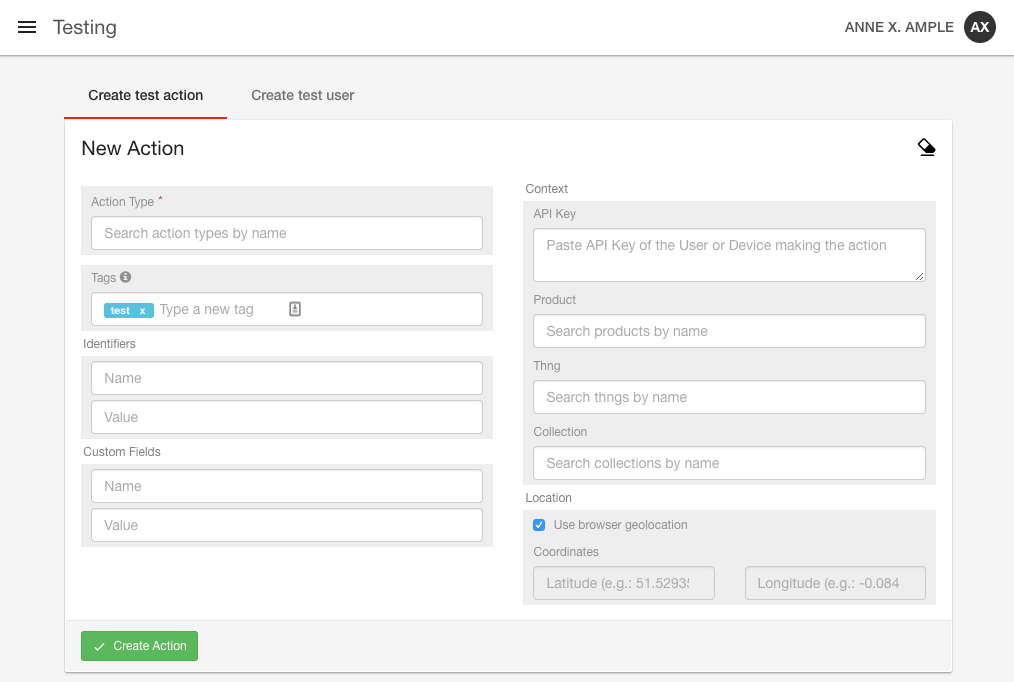
The Create test action tab enables you to create an action for testing, such as to test the output of a Reactor script in response to a new action being created.

To create a test action:
-
Click the Action Type field to select from the list of currently visible action types. Both custom and built in action types associated with the current account are listed here.
-
Fill in the form fields as needed. Besides the required fields and standard identifiers and customFields are various items that can be included in the
contextobject. These can be entered under the Context section of the form on the right side of the page. Data entered here is available as the context of the action after it's created. -
Click Create Action to save the action and then observe any testing output. You can reset the form anytime using the Clear form (eraser) icon in the top right to clear all the fields.
Users
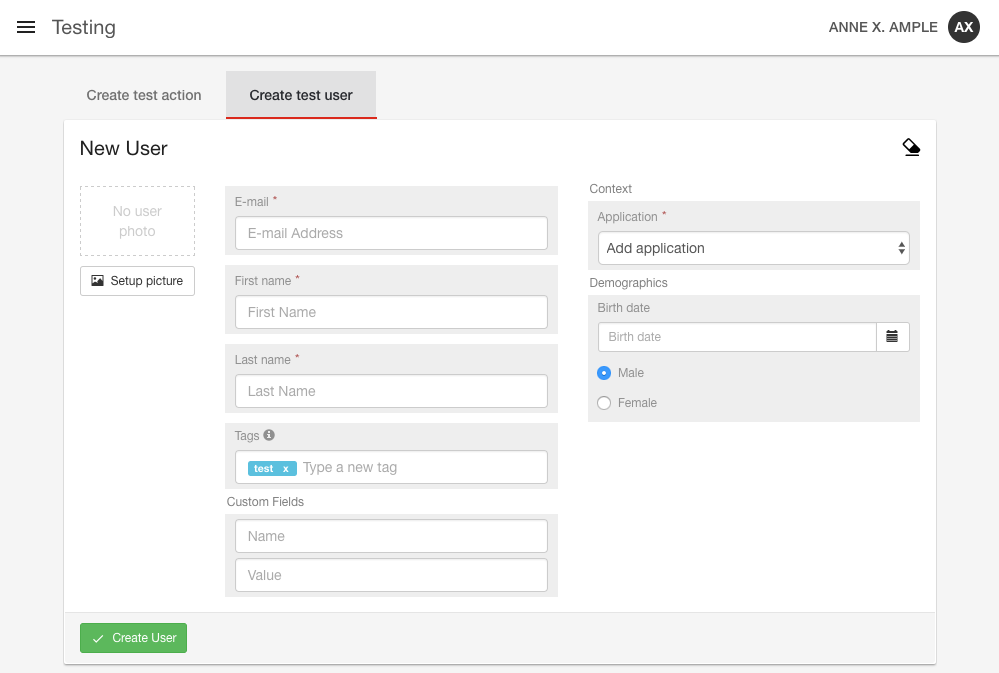
The Create test user tab enables you to create a user for testing. Creating a test user works similarly to creating test actions.
To create a test user:
-
Click the Create test user tab.
-
Fill in the required fields, Email, First name, and Last name.
-
For the Context, select the Application resource for the test user.
-
Optional: Add any desired tags and customFields. To add an optional user photo, click Setup picture to open the Configure User Picture dialog. Type the URL of the image, and click Update.
-
Click Create User to finish the process. The user can then be viewed from the Users section of the Dashboard.

Updated 9 months ago
