Dashboards
Admin FeatureAll the actions below, except cloning an existing dashboard, require the user to be the account Administrator. Any Operator whose role includes the My Dashboards permission can clone a dashboard.
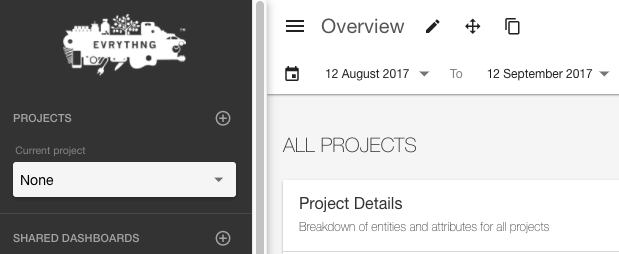
Besides customizing the dashboard pages, you can add your own and fill them with custom widget layouts. Dashboard pages fall into two categories:
-
Shared Dashboards - These are shared between all users in an account, and modifications to them are visible to all.
-
My Dashboards - These are unique and private to each user. Shared dashboard pages can be cloned and customized to suit your needs. Cloned dashboards are visible only if the user's Operator role has the My Dashboards permission enabled.
To see the customization options, click the Edit dashboard (pencil) icon on the toolbar next to the dashboard's name. The Dashboard customization dialog opens.
Adding and Removing Dashboard Pages
Creating a dashboard is easy. You can add custom components to it, as explained in Add a Dashboard Page, below.
By default, the EVRYTHNG Dashboard comes with three dashboard pages. These pages help you understand how users are interacting with your Thngs and products within projects and applications. If you don't need these pages, you can remove them as explained in Remove a Dashboard Page.
Add a Dashboard Page
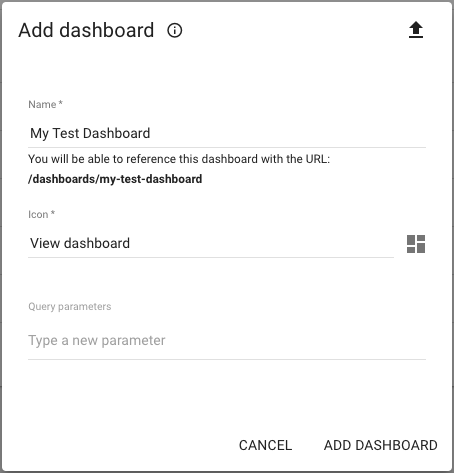
- Click the Add dashboard (⊕) icon from the left navigation pane next to the desired type. The Add dashboard dialog opens.
- Fill in the "name" field and any optional query parameters. You can use these parameters to pass information between dashboards or to bookmark a particular state. For example, we use parameters for filters and date ranges, so you can share a specific state with a URL link. Select an optional icon from the Material Design Icons collection.
- Click ADD DASHBOARD. A confirmation notification appears briefly before the dashboard reloads.
Remove a Dashboard Page
- Open the dashboard page you want to remove.
- Click the Edit dashboard (pencil) icon on the toolbar.
- Click Delete.
- When asked to confirm the deletion, click CONFIRM DELETE. A confirmation notification appears briefly before the dashboard reloads.

Cloning an Existing Dashboard Page
Shared dashboard pages can be cloned to create a duplicate for further modification. Any changes you make to the clone don't affect the original. A cloned page can be
- added as a new shared dashboard (visible to all Operators on an account, if their role has the My Dashboards permission enabled)
- added to your private My Dashboards section
To clone a dashboard page:
- Open the dashboard page you want to clone.
- Click the Clone Dashboard (copy) icon on the toolbar. The Copy dashboard dialog opens.
- Enter a name, icon, and URL configuration for the new page.
- For the target section, choose Shared Dashboards or My Dashboards.
- Click CONFIRM to apply the changes. The new Dashboards reloads.

Importing and Exporting Dashboard Pages
You can save a dashboard’s layout and configuration in a JSON file. You can share the file with others or add the dashboard to a different account.
To save the dashboard configuration for sharing:
- Click the Edit dashboard (pencil) icon to edit the dashboard.
- Click the Download dashboard configuration (download) icon in the top-right corner of the dialog. The file is saved to your computer's default downloads folder.

To import a dashboard:
- Click the Add dashboard (⊕) icon in the dashboard section of your choice. The Add dashboard dialog opens.
- Click the Import dashboard (upload) icon.
- Navigate to the folder where the exported JSON file was saved, select the file, and click Open.
- Make adjustments to the name, icon, or query parameters as needed.
- Click ADD DASHBOARD. The dashboard is imported and loaded.

Adding and Removing Widgets
Widgets are white cards used across the EVRYTHNG Dashboard, but you can customize the appearance. Widgets are contained in a section.
Add a Section
Before you can add any widgets to a new dashboard page, you must create a section for it.
- Click the Edit dashboard (pencil) icon next to the dashboard’s name in the toolbar. The Edit dashboard dialog opens.
- Click the Add new (⊕) icon next to the Sections item.
- On the right side of the dialog, give the section a name and description. These will appear above the widgets contained within it.
- Repeat the steps above to add as many sections as desired.
The Advanced settings option enables you to choose the layout type the section will use to organize the widgets. The options are:
- Grid - Widgets are organized into a vertical and horizontal grid of three to five cells in a row or column.
- Page - One widget fills the entire page.
- Column - Widgets appears in a single column.
Add a Widget
- Open the dashboard page you want to add the new widget to.
- Click the Edit dashboard (pencil) icon in the toolbar. The Edit dashboard dialog opens.
- Select the section to which you want to add the widget. See Add a Section, above, for information on how to add sections.
- Click the Add new (⊕) icon next to the Widgets label.
- Fill in the Name, which is the custom HTML tag given to your component. Tag names must contain a dash ( - ) to follow the standard. Begin typing a name to see a list of matching built-in widgets.
- When you’re finished adding widgets, click Update. Click CONFIRM UPDATE. A confirmation notification appears briefly, and the Dashboard reloads.

If you're adding a custom widget that's in a new bundle, add the URL of the bundle using the Advanced settings section of the dashboard configuration dialog. This file must be served over HTTPS because the Dashboard doesn't accept insecure external files.
For more information on creating custom widgets, see Creating Custom Widgets.

Update or Remove a Widget
- Open the dashboard page containing the widget you want to update or remove.
- Click Edit Dashboard in the toolbar. The Edit dashboard dialog opens.
- Click the section that contains the widget you want to update or remove.
- To remove a widget, click the Delete (trashcan) icon next to it. To update a widget, edit the Name property.
- To save the changes, click UPDATE in the bottom-right corner of the dialog.
- Click CONFIRM UPDATE. A confirmation notification briefly appears, and the dashboard reloads.
Add or Remove the Toolbar
The process for adding and removing the toolbar is the same as for adding and removing widgets. The only difference is where it's inserted in the configuration. A dashboard can contain only one toolbar. See the Widgets page for details.
To add a toolbar:
- Open the dashboard for which you want to add a toolbar.
- Click the Edit dashboard (pencil) icon. The Edit dashboard dialog opens.
- On the Details tab, click the Add new (⊕) icon next to the Toolbar label.
- Type a name for the toolbar.
- Click UPDATE in the lower right corner of the dialog.
- Click CONFIRM UPDATE.
Troubleshooting
Components File Failed to Load
When adding widgets, you might see this error message:

This means your components file couldn't be loaded correctly. This can be caused by:
- File doesn't exist (HTTP error code
404 "Not Found"); - File exists but isn't served over HTTPS (error
blocked:mixed-content); - File exists and is served over HTTPS, but the certificate isn't trusted (error
net::ERR_INSECURE_RESPONSE).
The latter happens if you're using a self-signed certificate that hasn't been validated by third-parties. In the Allow insecure localhost section we explain how to bypass this for development.
In Google Chrome, you can easily find this information in the Developer Tools (Settings > More Tools > Developer Tools) under the Console and Network tabs, as seen in the images below. Error messages can vary from browser to browser.


Component Is Not Displayed
If the file loads correctly but you still don't see your component, be sure its tag name is correct. The application appends an unrecognized element to the document, but no error occurs.
Updated about 1 year ago