Redirector
The EVRYTHNG Redirector lets you add context-aware logic to any short URL that's associated with a Platform Thng or product resource. This enables you to change where a short URL directs the browser, depending on multiple context items, such as time, location, the Thng or product in question, the user, and constant data.
Example Use Case
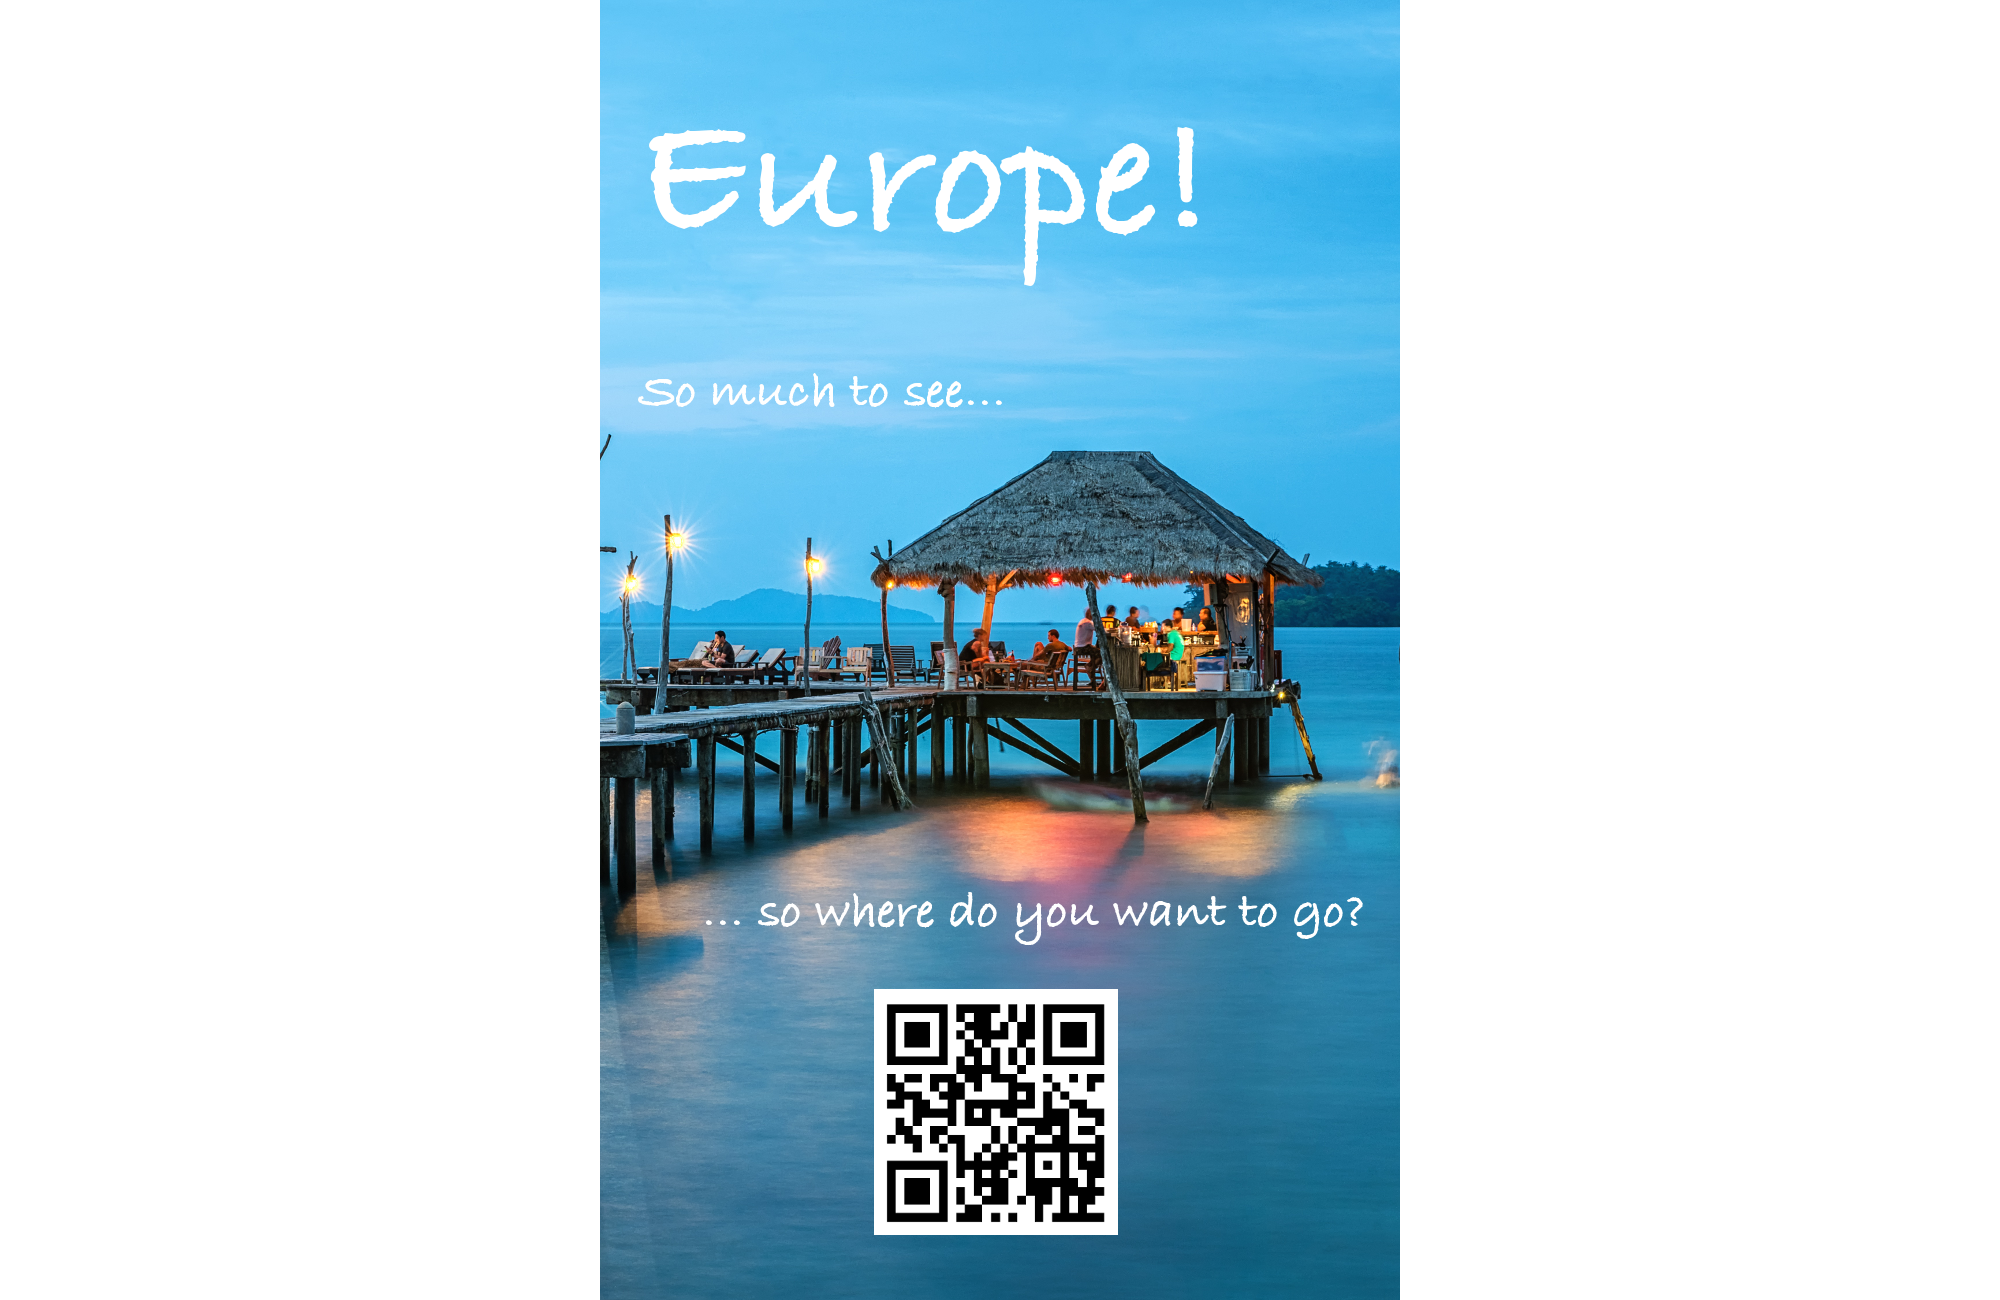
This example describes a "smart" advertising flyer (or leaflet) that contains a QR code encoding the short URL of an EVRYTHNG product. Such leaflets can be distributed at airports, events, or on the street. The flyer itself contains a call-to-action inviting the reader to scan the QR code with their mobile phone to receive contextualized information about recommended travel destinations for the specific country they are in.
The idea here is to produce only one version of the flyer but link it to specialized content using the programmable nature of the Redirector. Doing so produces a different redirection URL, depending on the country of the reader who has scanned the QR code. An example of such a flyer is shown below:
Solution Overview
To enable this contextualized experience, set up the following inside an EVRYTHNG account:
- A project to group the resources specific to this walkthrough, and an application representing this solution to contain the Redirector functionality.
- A product to represent the printed flyer containing the short URL and QR code that will be printed.
- An application-level Redirector containing the country-specific rules for URL redirection based on location.
- An account-level Redirector to delegate anonymous (third-party QR code scanners) visitors to the correct application-level Redirector.
Once all these components are set up, a scan of the product's QR code will result in a contextualized experience of recommended travel destinations based on the scanning user's country.
Create a Project
Create a project to group and scope the walkthrough resources:
Through the Dashboard
- Log into the EVRYTHNG Dashboard (or create an account if you don't already have one).
- Choose the Create project icon in the left navigation pane, next to Projects.
- Give the project a suitable name, such as "Redirector Walkthrough," and choose Create Project to finish.
Through the API
curl -i -H "Content-type: application/json" \
  -H "Authorization: $OPERATOR_API_KEY" \
  -X POST 'https://api.evrythng.io/v2/projects' \
  -d '{
    "name": "Redirector Walkthrough"
  }'
Create an Application
Create an application that contains the Redirector rules, allowing a dynamic redirection experience:
Through the Dashboard
- Ensure the project previously created is selected in the dropdown at the top of the navigation pane.
- Choose Applications and Add new at the top of the page to create an application resource.
- Give the application a suitable name, such as "Redirector Walkthrough Application," and choose Create application to finish. On the resulting page, the section titled Redirector is where the contextual rules will be placed later on in this walkthrough.
Through the API
Use the project's id to specify which project contains the new application.
Substitutions: :projectId
curl -i -H "Content-type: application/json" \
  -H "Authorization: $OPERATOR_API_KEY" \
  -X POST 'https://api.evrythng.io/v2/projects/:projectId/applications' \
  -d '{
    "name": "Redirector Walkthrough Application",
    "socialNetworks": {}
  }'
Create a Product
The next step is to create a product resource to represent the type of flyers to be printed. Because the flyers are identical, a single resource with a single QR code is an efficient way to link the physical item to the digital counterpart in the EVRYTHNG Platform.
Through the Dashboard
- Ensure the project previously created is selected in the dropdown at the top of the navigation pane.
- Choose Products and Add new at the top of the page to create a product resource.
- Give the product a suitable name, such as "Explore Europe Flyer," description, and brand name, and choose Create product to finish.
- Optionally, set the product image to differentiate it from other products in the account.
Through the API
Use the project's id to scope the resource to the correct project upon creation.
Substitutions: :projectId
curl -i -H "Content-Type: application/json" \
  -H "Authorization: $OPERATOR_API_KEY" \
  -X POST 'https://api.evrythng.io/v2/products?project=:projectId' \
  -d '{
    "name": "Explore Europe Flyer",
    "description": "A type of flyer recommending to scan for information about local attractions in European countries.",
    "brand": "HighFlyers Inc.",
    "photos": [
      "https://www.printexpress.co.uk/images/home/product-02-leaflet.jpg"
    ]
  }'
Create a Redirection
After the product is created, you must create a redirection that is associated with it. The result of this operation is a short URL that can be navigated to by any browser, and a QR code to facilitate this navigation. Someone who reads the flyer and scans the QR code is redirected to the short URL by the third-party scanner app, and in turn to an appropriate travel destinations page by the Redirector, after it is set up.
Through the Dashboard
- Navigate to the product's details page within the Products section in the navigation pane.
- Choose Setup redirection and enter a placeholder URL in the redirect expression field. This will be the result of redirection in the event that no other rules match.
- Choose Create redirection to finish. After this is done, a QR code and short URL are generated and shown on the product's details page. Try these now to confirm that they redirect as expected.
Through the API
Use the product's id to specify which product receives the redirection.
Substitutions: productId
curl -H "Content-Type: application/json" \
  -H "Authorization: $OPERATOR_API_KEY" \
  -X POST 'https://api.evrythng.io/v2/products/:productId/redirector' \
  -d '{
    "defaultRedirectUrl": "https://example.com?shortId={shortId}"
  }'
Optionally, verify the redirection is set up by navigating to the product's details page in the EVRYTHNG Dashboard, or by navigating to the short URL, whose components are returned in the response to the API request above. For example: https://tn.gg/ZQmS3S2PFA.
Set Up the Application-level Redirector
There are two main types of Redirector in an EVRYTHNG account:
- Account-level Redirector: accepts anonymous requests to short URLs and produces a redirection or delegates to an application within the account.
- Application-level Redirector: accepts project- or application-scoped requests (such as by an Application User API Key) and produces a redirection.
Set up the application-level Redirector to contain the actual rules that will govern the scanning user's final destination URL. Five example cases are provided, but this can easily be scaled to accommodate many more countries.
Through the Dashboard
- Navigate to the application's details page and scroll down to the Redirector section.
- For each of the rules in the table above:
- Choose Create rule from the application details page.
- Choose a suitable name (such as the name of the country).
- Add a condition that the country is the rule's country code (such as "GB").
- Enter the destination URL in the Redirect to field.
- Choose Create rule to finish that rule.
- Last, add a final catch-all rule for those users not in any of the above countries, redirecting to a general European travel page, and then use the arrow buttons to move it to the end of the list, to be processed last.
Through the API
It is possible to install all the rules in one request. Note the additional "Other" rule that will be matched in the event the scanning user is not in any of the above countries, redirecting to a general European travel page.
Substitutions: projectId, applicationId
curl -i -H "Content-Type: application/json" \
  -H "Authorization: $OPERATOR_API_KEY" \
  -X PUT 'https://api.evrythng.io/v2/projects/:projectId/applications/:applicationId/redirector' \
  -d '{
    "rules": [{
      "match": "country=IT",
      "name": "Italy",
      "redirectUrl": "http://www.italia.it/en/discover-italy.html"
    }, {
      "match": "country=DE",
      "name": "Germany",
      "redirectUrl": "http://www.germany.travel/en/towns-cities-culture/towns-cities/towns-cities.html"
    }, {
      "match": "country=ES",
      "name": "Spain",
      "redirectUrl": "http://www.spain.info/en_GB/que-quieres/ciudades-pueblos/"
    }, {
      "match": "country=FR",
      "name": "France",
      "redirectUrl": "http://uk.france.fr/en/dispatch/destinations"
    }, {
      "match": "country=GB",
      "name": "Great Britain",
      "redirectUrl": "https://www.visitbritain.com/gb/en/destinations"
    }, {
      "name": "Other",
      "redirectUrl": "https://www.lonelyplanet.com/europe"
    }]
  }'
Set Up the Account-level Redirector
With the application-level Redirector set up, and project/application scoped requests to the short URL will be redirected as intended. However, requests coming from third party scanning apps will be anonymous and will not be handled by the application-level Redirector directly.
To bridge the gap, the account-level Redirector can delegate a redirection decision to any application based on a large variety of contextual data. In this example, the product ID is used to delegate requests to the "Explore Europe Flyer" product QR code or short URL to the application-level Redirector, which will produce the correct destination URL based on the user's location.
Through the Dashboard
- Navigate to the product's details page, and copy its ID.
- Choose Redirector from the left-hand navigation pane.
- Choose Create rule and add a condition that the product ID is the one that was just copied and represents the type of flyer being printed.
- Select the Let application decide drop-down field and select the application that contains the country-based Redirector rules.
- Choose Create rule to finish setting up the account-level Redirector.
Through the API
NoteIf any existing account-level Redirector rules are present in the account, ensure the
rulesarray shown below is combined with those rules that are already present; otherwise, they're overwritten.
Substitutions: projectId, applicationId, productId
curl -i -H "Content-Type: application/json" \
  -H "Authorization: $OPERATOR_API_KEY" \
  -X PUT 'https://api.evrythng.io/v2/redirector' \
  -d '{
    "rules": [{
      "match": "product.id=:productId",
      "name": "Redirector Walkthrough Delegation",
      "delegates": [{
        "app": ":applicationId",
        "project": ":projectId"
      }]
    }]
  }'
Conclusion
Now that all the moving parts of the solution are set up, it's time to test it out. Navigate to the product's details page in the EVRYTHNG Dashboard, imagine you'd been handed the flyer at an airport on your first day on holiday, and scan the QR code.
Depending on which country the originating request comes from, a different final destination page is shown. Depending on the requirements of the solution, more Redirector rules can be added for more European countries, or even in a more general scope, such as the rest of the world.
For more information on the Platform features involved in this walkthrough, see the pages below:
Updated about 1 year ago