Things Connected
Things Connected is an initiative by Digital Catapult, to support UK businesses using LPWAN technologies. It is a free LoRaWAN network and it is intended for the prototyping of new products and services that can benefit from the unique features of LPWAN.
EVRYTHNG is an official Things Connected platform partner, providing an IoT platform for Things Connected devices through a scalable bridge. This allows Things Connected devices to send data to EVRYTHNG where our Platform tools such as the Reactor or our Analytics can be used to add value to the data collected by the Things Connected device. This page is a step by step tutorial on how to connect a Things Connected device to the EVRYTHNG Platform.
Creating the EVRYTHNG Resources
Log into the EVRYTHNG Dashboard and start by creating a project and a corresponding application. Copy the Trusted API Key of your application as this will be the API key used to authenticate incoming Things Connected requests.
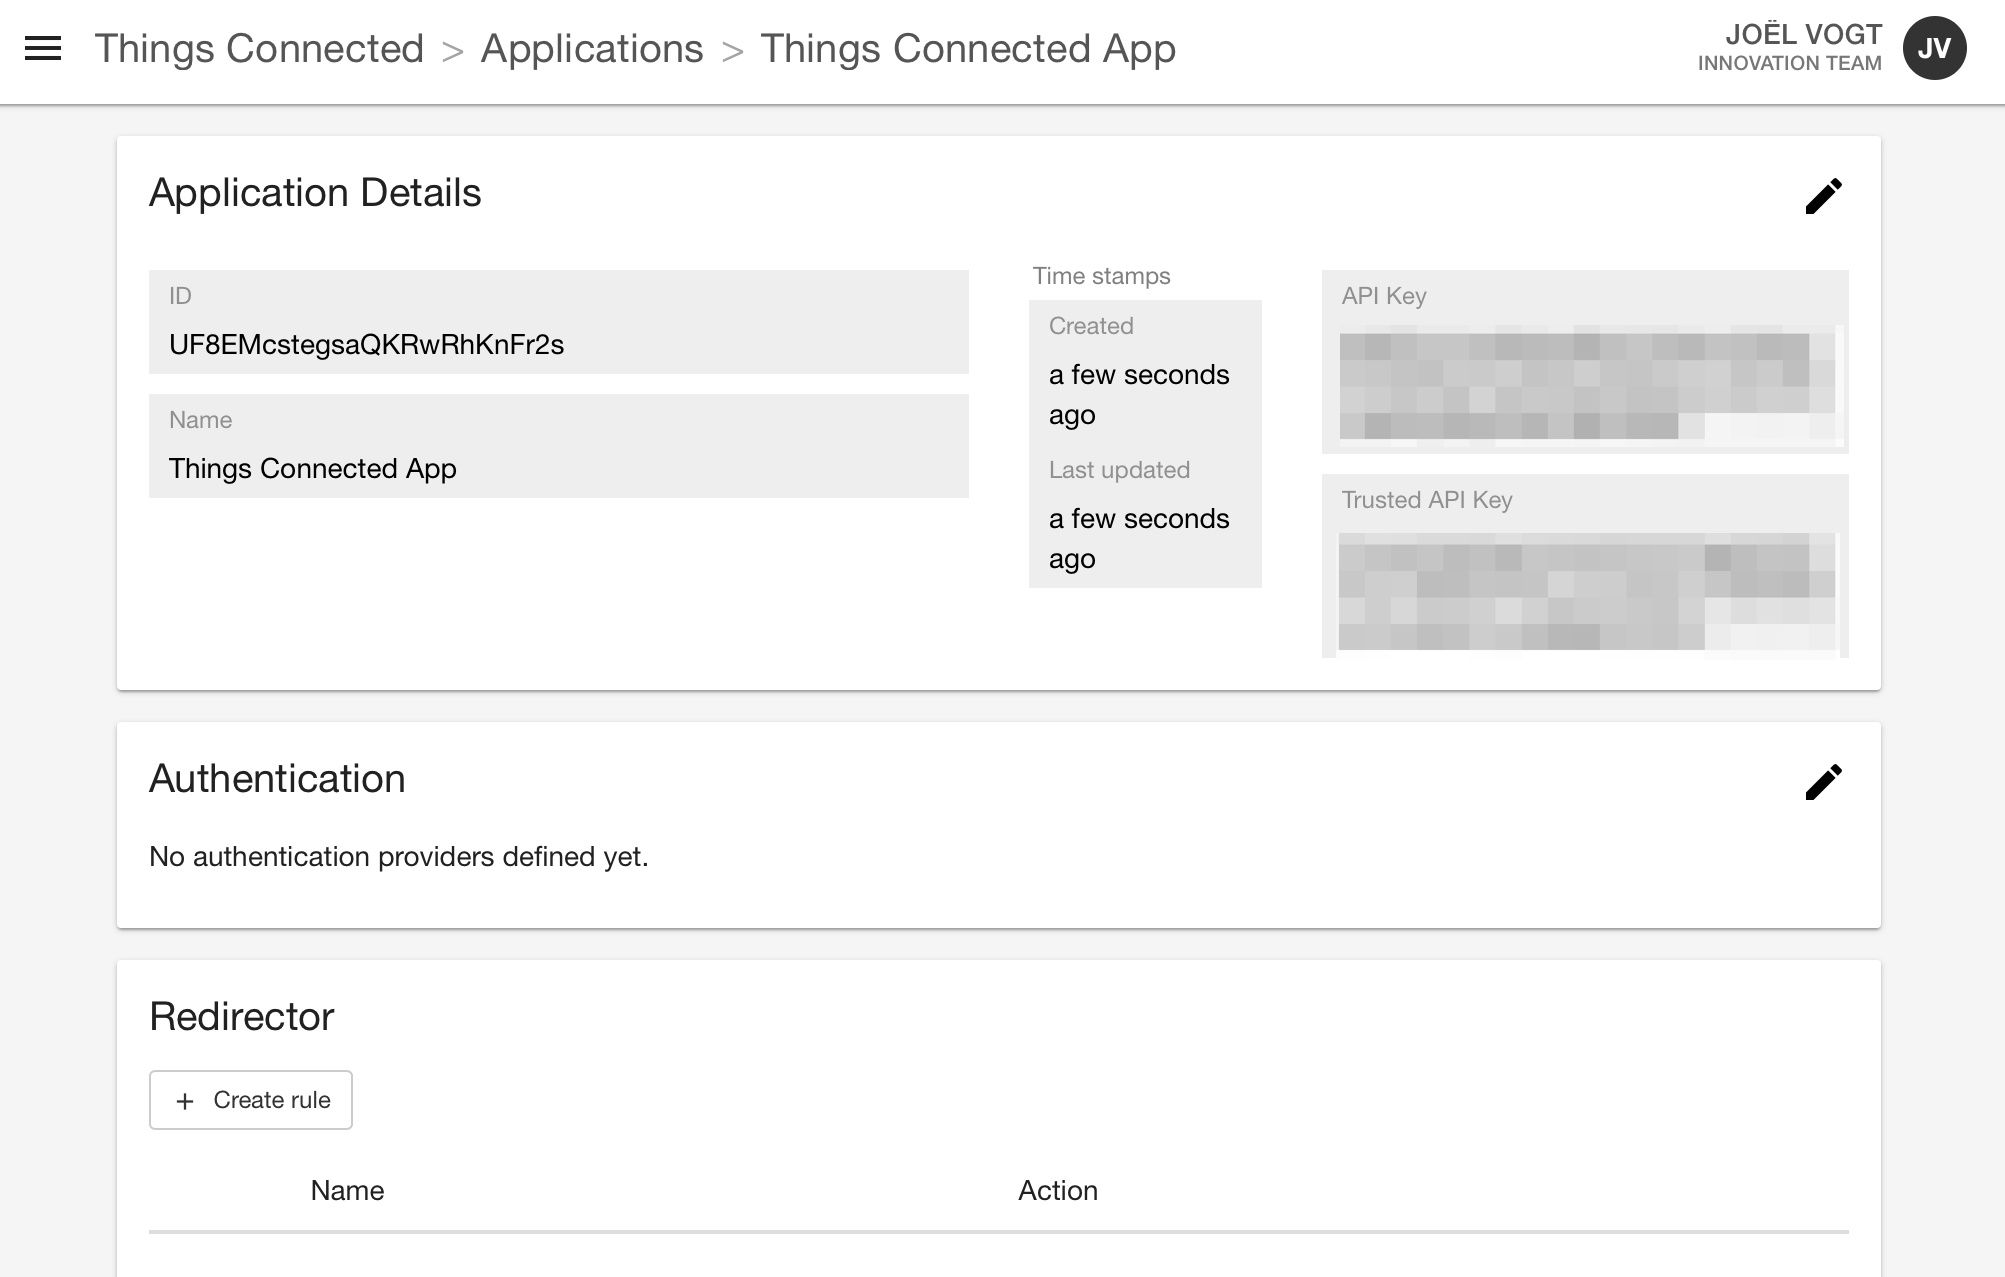
Next, create a product to represent the type of Thng. A product is optional, but it helps to organize Thngs according to their type. We will return to the project and application after having connected the LoRa device to the Things Connected network.
Things Connected Account
Create a Things Connected account. Sign in to the Things Connected dashboard and create a new device.

Create a new device, select a name, and use the default ‘Activation Type’, "Activation by Personalization". Then click “Next”.
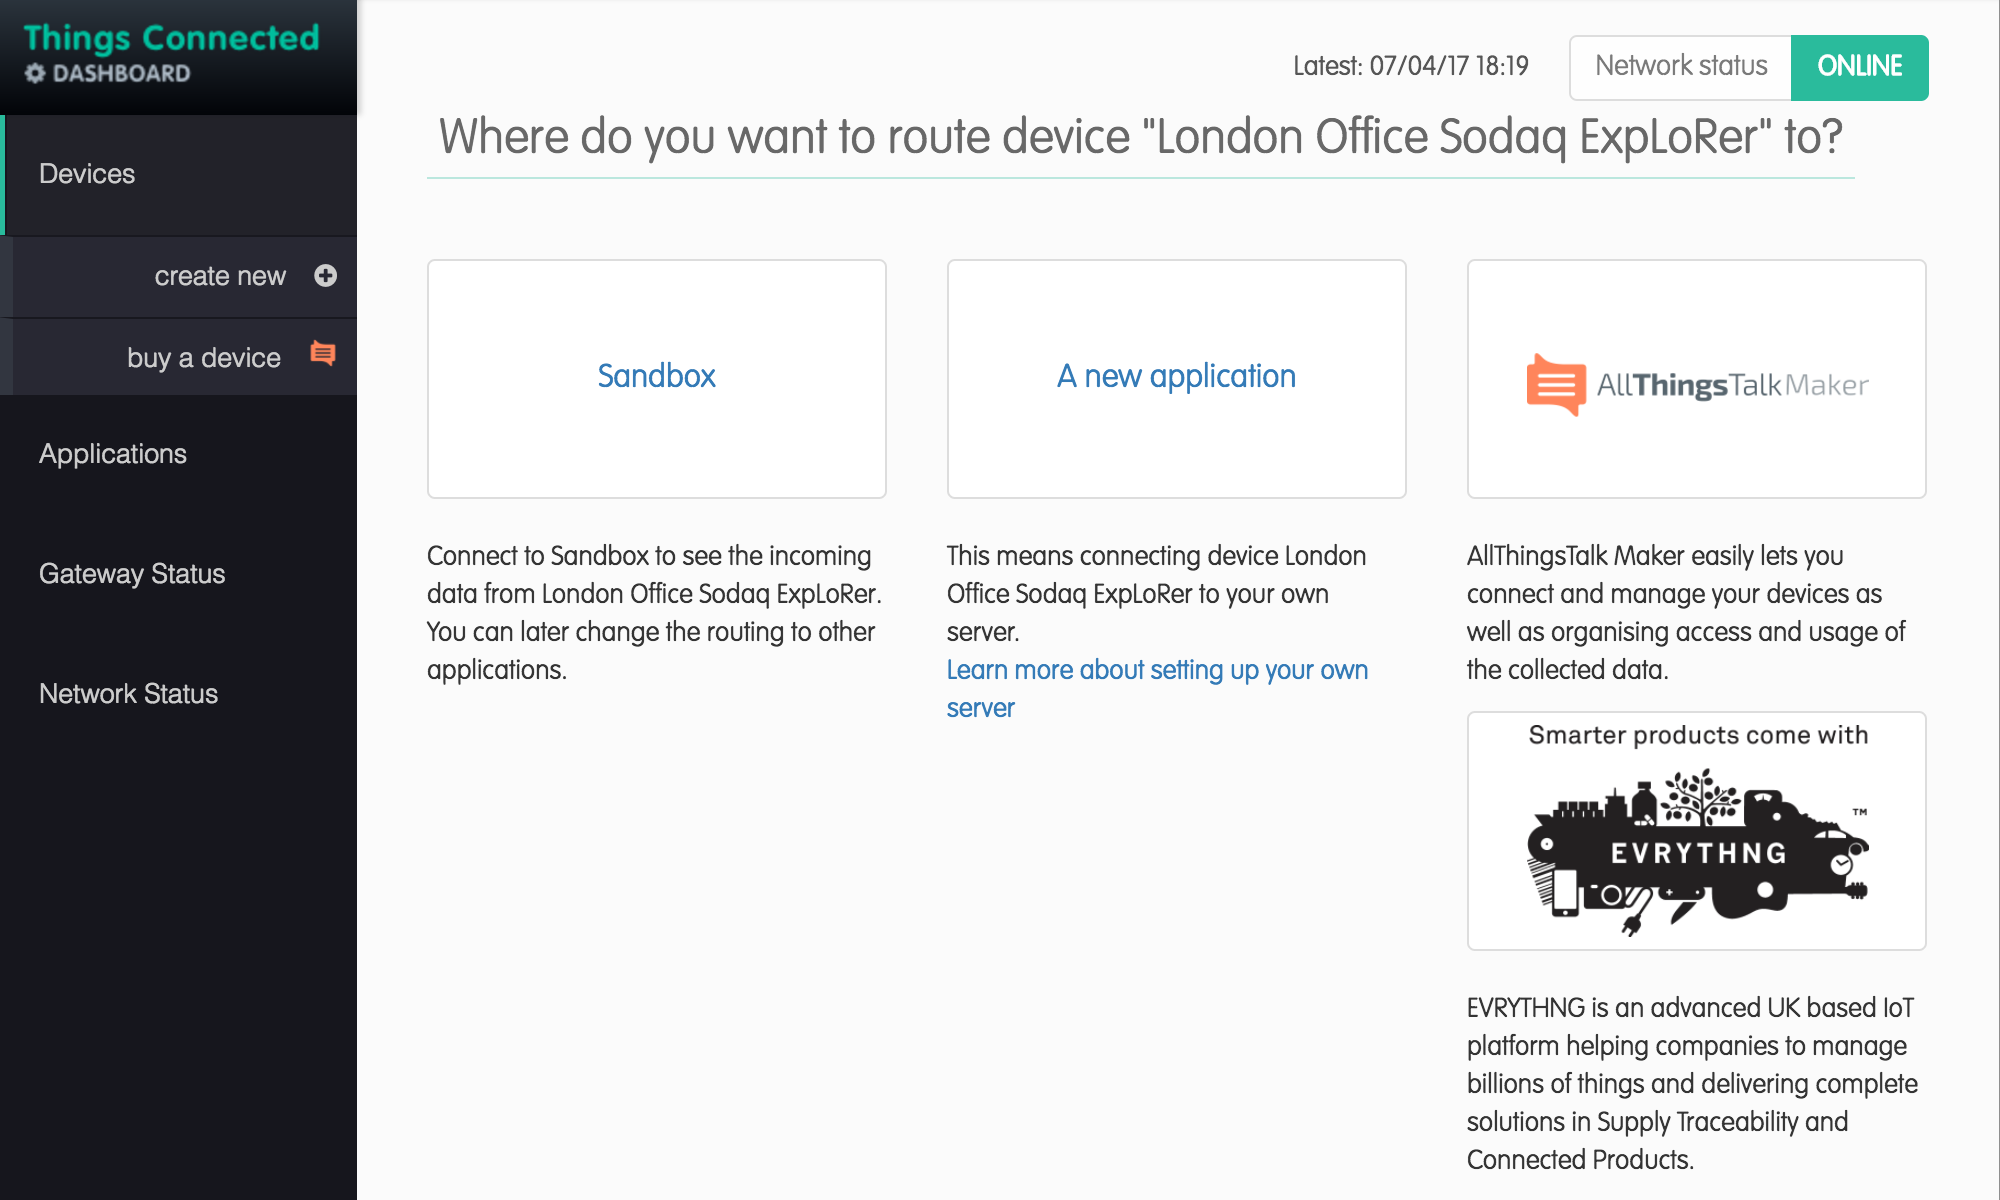
You can now connect the LoRa device to a specific ecosystem. Pick EVRYTHNG. This creates a routing rule to relay messages between EVRYTHNG and Things Connected. Please note that we currently only support one way communication, from Things Connected to EVRYTHNG. In the next dialog, you’re asked to provide the EVRYTHNG Trusted Application API key as a configuration parameter.
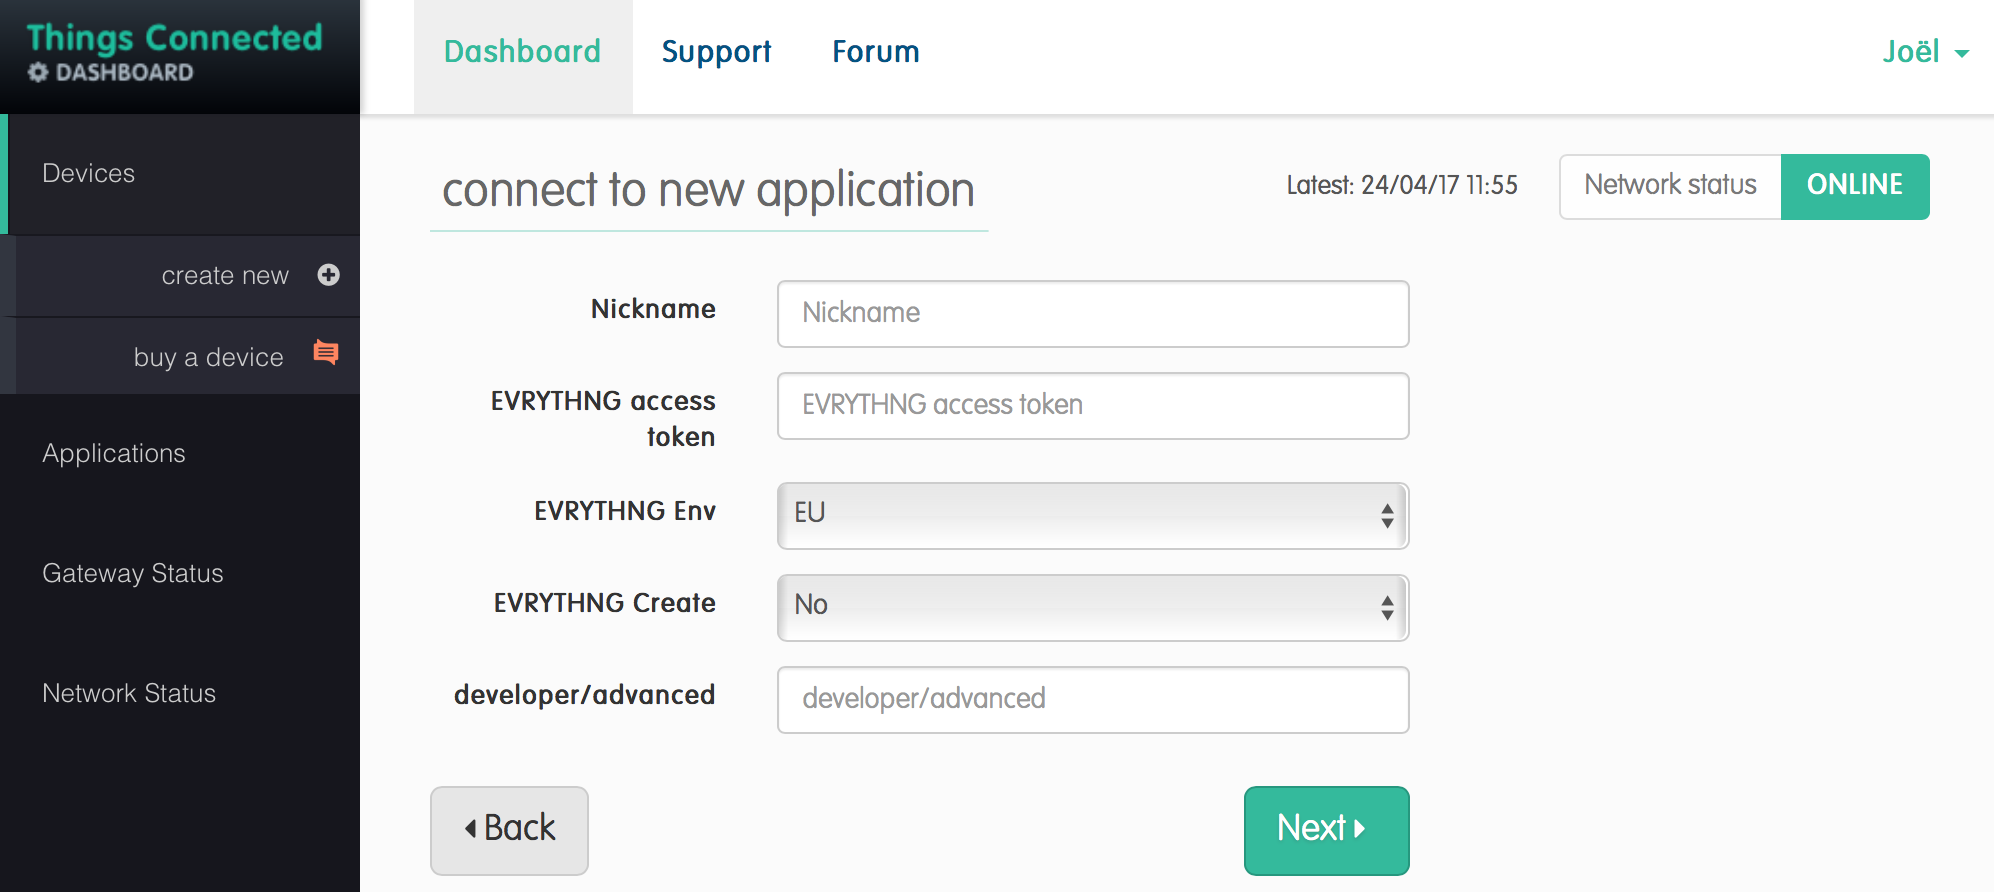
Things Connected requires the Trusted Application API key, the EVRYTHNG platform region and an instruction regarding the Thng creation process. With the Trusted Application API key, Things Connected will be able to write property updates to the Thng that represents the LoRa device.
If your EVRYTHNG account is in the European EVRYTHNG platform, set EVRYTHNG env to “EU”, for an account in the U.S. EVRYTHNG platform, set EVRYTHNG env to “US”.
The default value for EVRYTHNG create is “No”. This means that Things Connected device to EVRYTHNG Thng mapping must be done manually, as described below. The option EVRYTHNG create “Yes” creates a new Thng for the Things Connected device. This new Thng will contain an identifier deviceEUI with the device EUI of the Things Connected device.
Click “Next”. You’re almost done. The LoRa device profile in Things Connected is now setup with the necessary permissions to access EVRYTHNG.
## Mapping a Things Connected Device to an EVRYTHNG Thng
To complete the Things Connected -> EVRYTHNG bridge for the LoRa device, return to the EVRYTHNG Dashboard. We need to add a custom identifier, by convention called deviceEUI, with the device’s EUI value. This will allow Things Connected to lookup the Thng that corresponds to the LoRa device, and update properties accordingly.
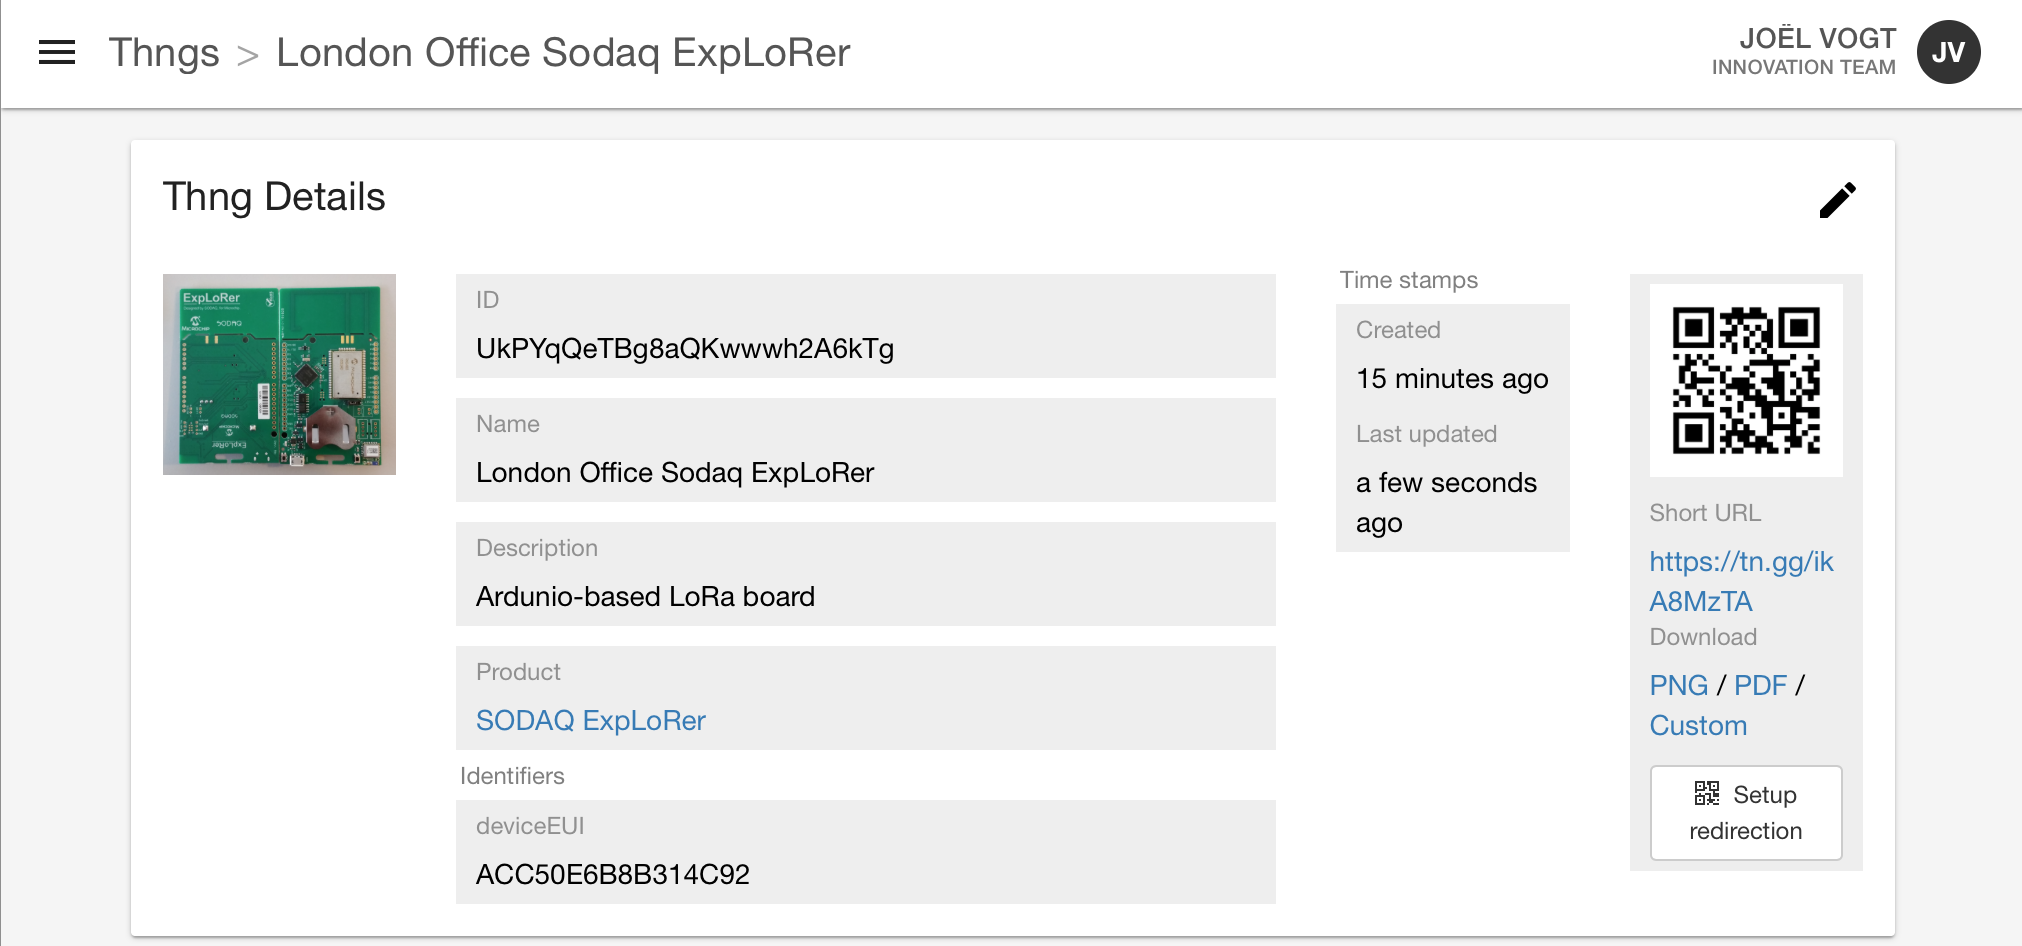
If you would like the bridge to automatically create EVRYTHNG Thngs for a given device EUI (if the device was not found), add create=true to the query parameters. For example:
https://things-connected.evrythng.com/v1/create=true
## Connecting to Things Connected Network
The last step is to connect a LoRa device to the Things Connected network. The following example is for the Sodaq Explorer.
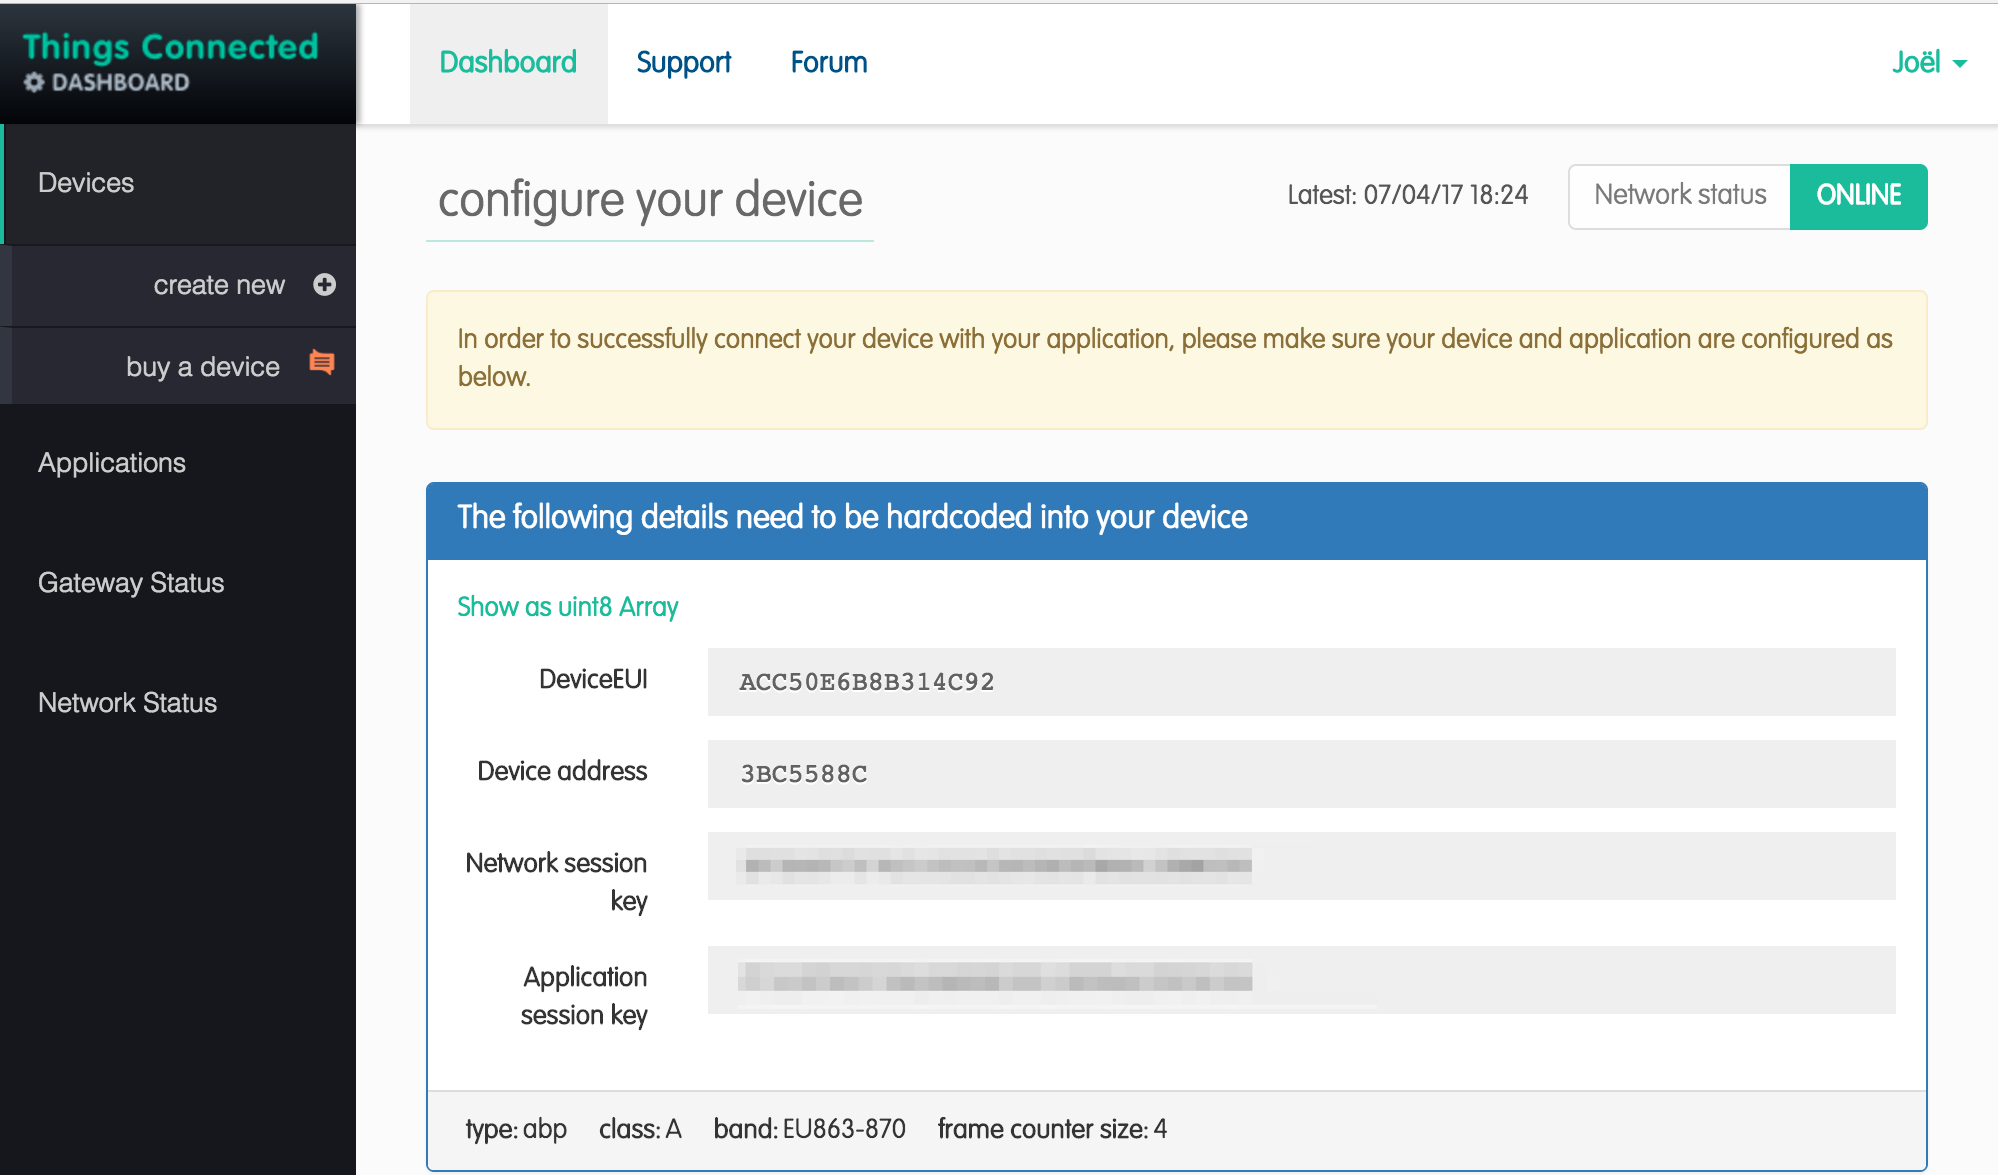
When the device was added, Things Connected displayed the device’s configuration parameters, which must be added to the application that will be deployed on the Sodaq Explorer. Here is an example:
const uint8_t devAddr[4] = {0x3B,0xC5,0x58,0x8C};
const uint8_t appSKey[16] = {0xF7,0x23,0xF9,0x69,0x70,0xA2,0xAB,0xDE,0xC0, ...};
const uint8_t nwkSKey[16] = {0x3F,0x3D,0x69,0x75,0x76,0x31,0x02,0x2C, ...};
Payload
Our Things Connected integration expects a base 64 encoded string which has the following format: key1:value1,key2:value2,...,keyN,valueN.
For example, the Arduino code sample prepares the payload C:1438,TH:14.51,TM:14.5,H:53.4 as follows:
String StrToSend = String(CounterLabel) +String(Counter)+","+ String(TempLabel) + String(TempValue) +","+ String(HumidityLabel)+ String(HumidityValue);

StrToSend.toCharArray(PayloadToSend, 30);
Connecting the LoRa Device
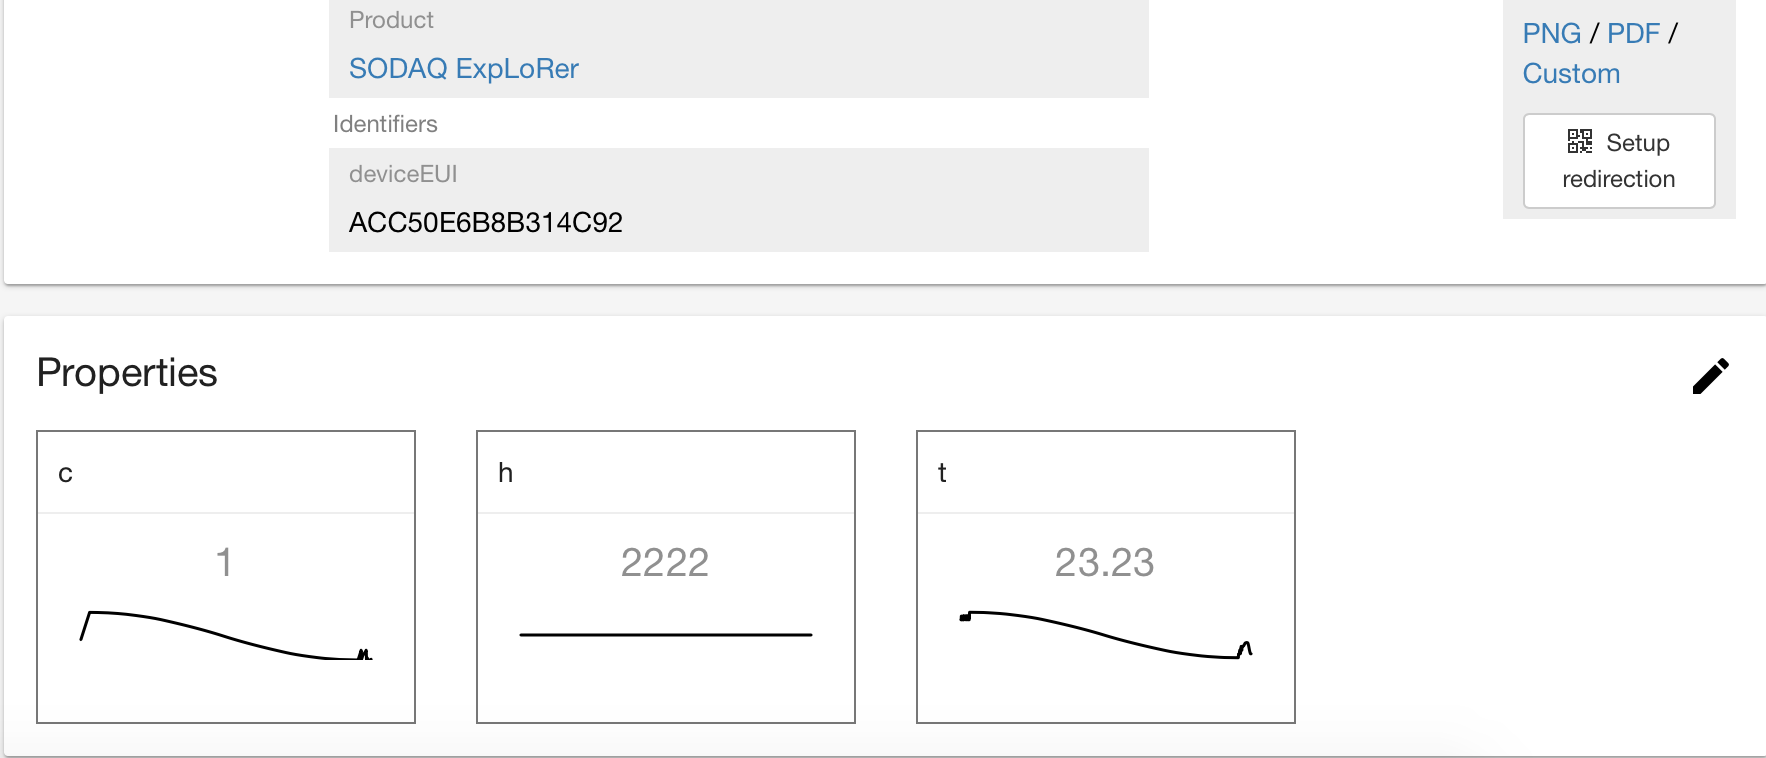
Compile and deploy the app. If the setup was successful, you will see properties being updated in the EVRYTHNG dashboard.
Updated 8 months ago
