Scan and Track Products
The Identifier Recognition API allows you to easily add identifier recognition technologies to any web-based application. With a small amount of setup, you can identify products using 1D or 2D barcodes or image recognition technology.
This walkthrough takes you through the few steps needed to configure your project inside the EVRYTHNG Platform for recognizing QR codes, images, and barcodes. The system is extensible, so if there is a type of recognition you don’t see yet supported feel free to contact us.
## How Identifier Recognition Works
Simply put, the Identifier Recognition API is a connector to the EVRYTHNG Platform. It can be accessed through our evrythng.js and evrythng-scan.js SDKs or directly through the REST API. The libraries handle the chores of taking a captured photo, authenticating with the EVRYTHNG Platform, and returning the metadata about the recognized product. This process is illustrated in the diagram below:

Before You Start
Ensure you have the following items necessary to follow along with this walkthrough:
- An EVRYTHNG developer account. These are freely available here.
- A laptop or desktop with printing facilities.
- A standard drinks bottle. You will replace the label with one enhanced with a QR code.
- A mobile phone with a camera.
To enable image recognition of a photographed product you will follow these steps in the EVRYTHNG Dashboard:
- Create a project and application to track the product and scan statistics.
- Create a product to represent the physical bottle.
- Enable your project to be able to track the physical bottle with a generated QR code.
- Create a simple web application that will allow uploading of an image and return recognition results.
### Set Up the Physical Product
The Identifier Recognition API is designed to be used to recognize printed ID codes and product logos on physical objects. For the purposes of this walkthrough, you will use a bottle of liquid. The types of ID code we can recognize include:
- A QR code. You will generate one of these inside the EVRYTHNG Dashboard later on.
- Several types of 1D and 2D barcodes.
- A product logo. This should be easily discernible from the background it sits on - typically the logo on any mass produced product is a good example of this.
Below you’ll find an image that you can print out and wrap around a 500ml / 20oz bottle of liquid to mimic the product to be recognized. Note that we’ve left a space for the QR code that you’ll get later on.

Set Up the Programming Environment
All you need from a programming perspective is a laptop or desktop which should include:
- A development environment capable of editing HTML - your favourite text editor will do.
- A web browser with a connection to the internet. The example we’re using will work locally on your computer, but can be hosted on a standard web server as well.
## Configure Your Product
First, you will configure the EVRYTHNG Platform to be ready for requests from your web application. If you don’t yet have an account with the EVRYTHNG Platform, you will need to set one up now - you can do so by navigating to the EVRYTHNG Dashboard. Once your account is activated, we can begin.
NoteIf you created your EVRYTHNG Platform account before July 19th, 2016, you may need to contact us to enable the Identifier Recognition API.
### Create a Project
Projects define scope inside the EVRYTHNG Platform. They allow you, the solution provider, to have some products and/or Thngs related to one project and visible to some users, and some products and/or Thngs related to another project visible to a second group of users. You will first need to create a project to store objects for use in this walkthrough.
To start, log into the EVRYTHNG Dashboard, which takes you to the Overview screen:
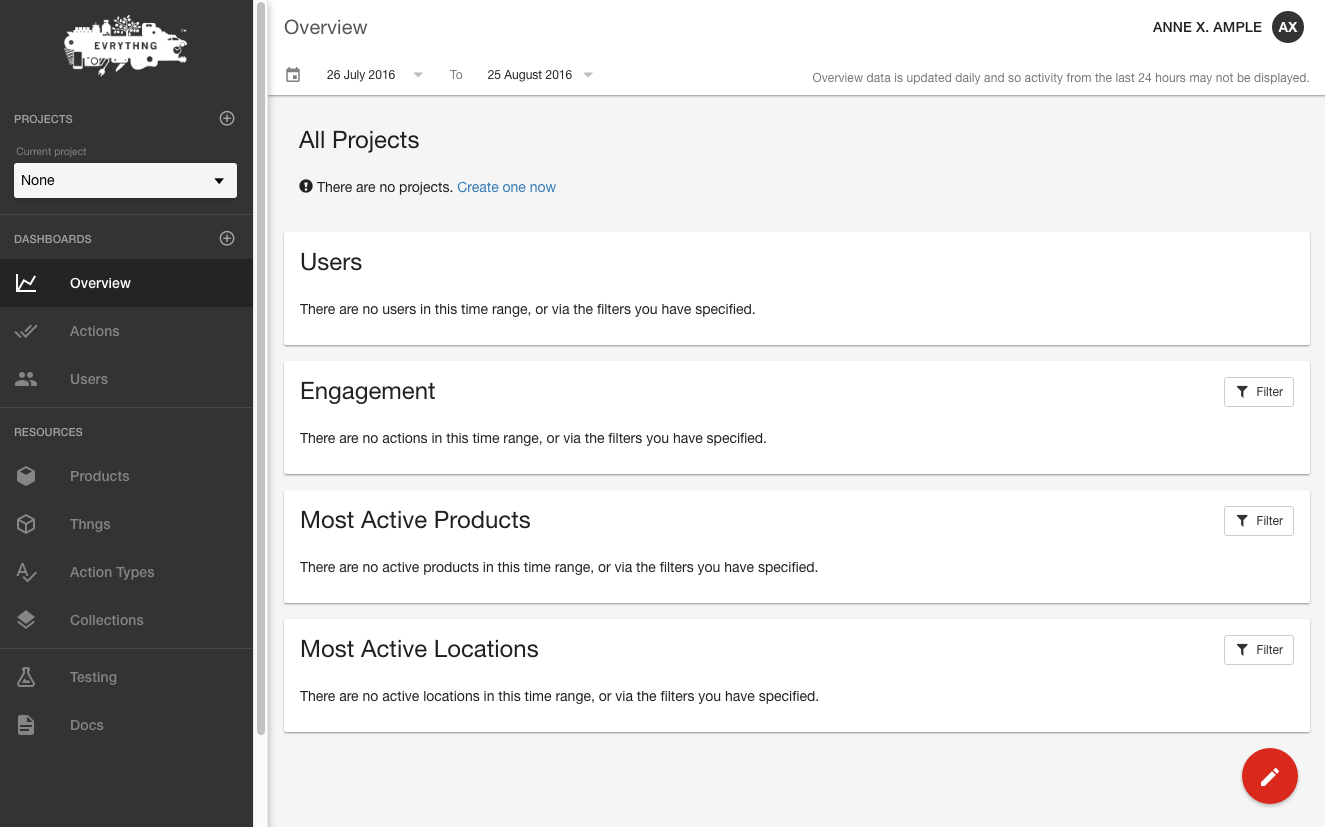
Click the plus button next to “Projects” in the sidebar. Enter a name for your project, and optionally add a description. You must also select a Short Domain for the application - use the default (tn.gg) for this example. Next, click “Create Project” to complete the dialog.

You’ll see the Project Details screen - this lets you view (and later modify) the project if needed.

Create an Application
Applications are a secondary method of scoping actions and behaviours of the EVRYTHNG Platform. In this example the application represents a customer engagement program or campaign app that will be used to scan the product and receive some benefit.
Click “Applications” in the sidebar. Take special note of the 'Current Project' drop down in the sidebar - it should contain the name of the project you’ve just made. If it does not, select it before continuing. Applications in the EVRYTHNG Platform are always scoped to (i.e.: belong to) a specific project.

Now click “Add New”. Enter a name for your application, optionally add a description, and click “Create application”.

The Application Details screen shows relevant information about the configuration of the current application.

Note down the value under 'API Key' - this is the authentication token that will let your web application interact with the EVRYTHNG Platform, and will be used later in this walkthrough. There is also a Trusted API Key associated with this application, but we are not concerned with it for the purposes of this walkthrough.
Create a Product
Products are the highest-level representation of your actual physical product inside the EVRYTHNG Platform - typically stock keeping units (SKUs) are described at the product level. You will now create a product that represents the object to be recognized.
Start by clicking “Products” in the sidebar.

Click “Add New”. You’ll be presented with a form to define your product. Enter a name and optionally any of the other fields.
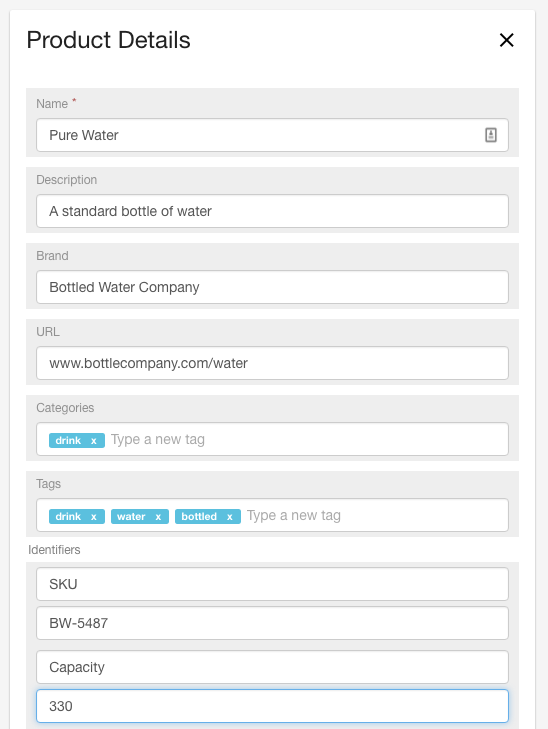
Click “Create product” to finish creating the product. You should be presented with the Product Details screen, which is where we will finish configuring the application:

Take special note of “Setup redirection” on the right - this will be used for setting up identifier recognition options. Let’s start with redirection, which will enable QR code support.
## Configure a Redirection via QR Code
Redirections allow you to place a permanent identifier on your product (such as a QR code), but at any time also allows you to redirect it to a non-permanent URL on the web. For example, this allows you to print a fixed code on a physical label and still be able to modify the link's destination after the product has shipped using the EVRYTHNG platform.
Start by clicking “Setup redirection” - you’ll be presented with a dialog. Set “Application” to the one you just created to associate it with the redirection. The only other item you need to edit is the “Redirect expression” - this is the URL to which you want the application to take your user once they have scanned your product:

Click “Create Redirection”, and you’ll return to the Product Details screen. There should now be a QR code and redirection short URL available to you:

Click on the “PNG” link to see (and optionally download) a copy of this QR code. We’ll use this soon, but you can scan the QR code and click the short link now to check the redirection is working as expected. The application is now ready to use Identifier Recognition API to recognize QR codes, but more powerful image recognition is only a few clicks away.
## Configure Image Recognition
Now you will configure the application to recognize your product with reference images you supply instead of scanning a printed code.
To support image recognition, supply one or more reference images of the real product to the EVRYTHNG Platform via the Dashboard. This will aid it in determining whether or not any given image contains your product. A good set of reference images will:
- Be taken from at least three angles, such as directly in front and 45 degrees to either side.
- Include additional cropped images of any logos or images that will be recognised.
- Avoid relying on any reflective or mirrored surfaces on the product, as this will degrade performance in brightly lit environments.
Note“Setup image recognition” is only available if you have the Image Recognition module activated. However, it’s still possible to use the Identifier Recognition API for barcodes and QR codes without having Image Recognition enabled.
While still on the Product Details screen, click the “Setup image recognition” button. This will present you with another dialog. Using this dialog, upload one or more images depicting the front and three-quarter views of the logo or area you want to be recognized on the product itself:

Close the dialog and you’ll be ready to go. Now we’re ready to try the example web application, and see the Identifier Recognition API in action.
## Using the Web Application
To try out the example web application you can either:
- Clone the example repository to your local development environment. If you would like to access the application from a real mobile device, the files can be hosted on any standard web server. For example:
$ python -m SimpleHTTPServer
- Open this JSFiddle of the same project. This can also be opened on a mobile device and can use the device’s camera instead of a file upload.
The example we’ve provided is basic but demonstrates the most important components for you to include to make your project work in a web application. The components of the application include:
index.html- a basic HTML page that allows the scanning of the QR code via a button. A user that clicks on the “Scan Anything” button will be asked by the library to upload a photo. Once the result is returned, the JSON payload describing the product will be displayed below the buttons.script.js- a JavaScript file that usesevrythng-scan.jsto do the heavy lifting - authenticating the application with the EVRYTHNG Platform, handling file upload, and returning data after a successful scan.
The HTML file needs no code modifications and will work as-is, served from your computer’s file storage or a remote server. We do however need to make a simple modification to the script.js file. Look for and replace the text $APP_API_KEY with the API key you noted before during the application configuration:
const API_KEY = '$APP_API_KEY';Run the web application via a local or remote web server with the correct API key in place, and everything should be ready to test your first Identifier Recognition API web app.
### Recognize the QR Code
Open up the web application in your browser window. You will notice a button allowing you to upload an image file for recognition:

First, click the “Scan Anything” button. You should be prompted to upload an image. For this walkthrough, we suggest using the QR code image you just downloaded from the dashboard after setting up redirection. For added realism, attach the QR code to the example label, print it out, and wrap it around the bottle of liquid. This should look like the example shown below:

Submit the photo once you have selected it.
Response Data
Within a moment, you should see a response similar to the one shown below from the application if the recognition was successful:

A JSON string is returned by the EVRYTHNG Platform for a recognized product, in addition to the redirection response that contains the final destination of the user. The fields of the response are detailed below:
-
shortDomain- String
The domain component of the object’s web address. -
defaultRedirectUrl- String
The default URL the redirection will resolve to if there are no additional rules or actions applied to the product. -
redirectUrl- String
The URL that a user should be directed to. This will also reflect any additional rules set up using the Reactor. -
type- String
Whether the identified object is a generic type of item (product) or a uniquely serialized item (Thng). -
evrythngUrl- String
The REST API URL for the object. -
shortId- String
The short identifier that, when combined with the short domain, is the web address of the object. -
evrythngId- String
The unique identifier for the object within the EVRYTHNG Platform.
Recognize an Image
Now you can try recognizing an image of the product instead of just scanning a QR code.
NoteThis next step will only work if you have also configured reference images for your product, as shown earlier.
Take a photo of the logo on the bottle with your mobile phone. The area of interest should take up a significant portion of the image, like so:

From the web application, click “Scan Anything”. Upload the photo that you took, and again you should see the same results as before. If it does not work, ensure the photo taken shows clearly the correct details to match the reference image.
Recognize a Barcode
Although many 1D and 2D barcodes are not unique down to the item level, we have already included a UPC-A barcode on the sample label above. To activate this barcode, you only need to add an additional piece of metadata to the product associated with your application.
Return to the Product Details page for your product in the Dashboard. Click the pencil icon to edit the details of your product, and enter the following into the identifiers section of the screen:

Save the changes to the product. This lets the EVRYTHNG Platform know that if the Identifier Recognition API recognizes any UPC-A barcodes with this code, it refers to your product.
Now go back to the web application, and click “Scan Barcode”. Upload an image of the bottle that shows the barcode in the centre of the frame:

Again, you should see a success message including the information about your product. That’s it - you can now tie your physical product in the real world to a unique identity in the EVRYTHNG Platform!
For more information on the types of barcodes we support, see the Identifier Recognition page.
Next Steps
Once you have a product in the EVRYTHNG Platform that can be used for recognizing instances of it in the real world, we encourage you to read up on other aspects of the platform to make the best use of it, including:
- Reactor - A rules engine to react to metadata about successful scans.
- Redirector - Create dynamic redirections based on scan metadata.
Lastly, make sure to read the comprehensive documentation in the evrythng-scan.js GitHub repository.
Updated about 1 year ago