Nest Integration Reference
Nest is a cloud-based platform that provides a number of devices to control and monitor your home (e.g thermostats, smoke detectors, and cameras). Nest devices can be connected to EVRYTHNG so that events and data can be received and react to in the EVRYTHNG platform.
This integration allows developers to import the Nest devices into their EVRYTHNG account and work seamlessly with them through the EVRYTHNG platform, while keeping up to date with the status of the device in the Nest cloud.
To enable an EVRYTHNG application to use Nest devices, you need to customise the generic steps defined here with:
-
A Nest device model that describes for each Nest device which fields are to be synchronized. The connector model defines which properties and actions supported by Nest are known by the Nest connector.
-
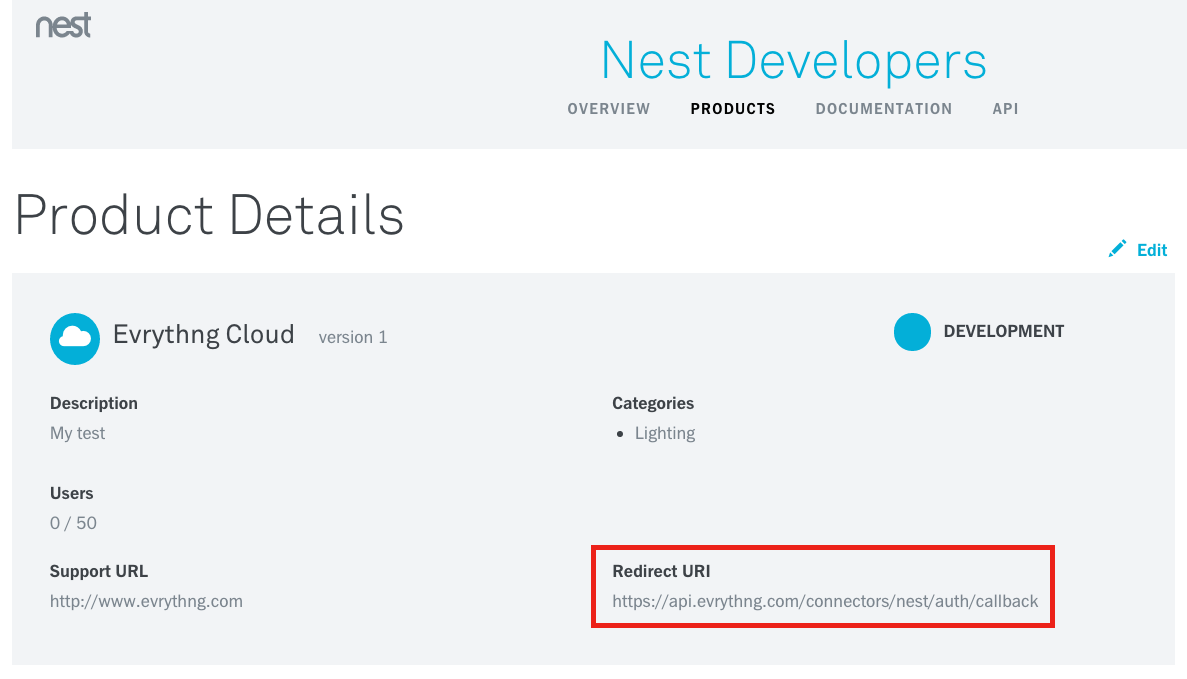
Authentication with Nest: You will need to create a Nest Product in your Nest Developer account, that will be assigned a
clientIdand aclientSecretto use in the OAuth authentication and creation of the Nest connector in the EVRYTHNG Platform. -
Access to the Nest User account in your application: the user-facing application should implement the authentication and authorization process in order to be able to start using the Nest devices. This process can be triggered by loading the
authUrl(see below).
API Status
Stable:
/connectors/nest/auth
/connectors/nest/auth/callback
/projects/:projectId/applications/:applicationId/connectors/nest
NestModelDocument Data Model
The ThngDocument maps a Thng to a Nest Device. It can contain any property or value from the Nest model. See the example below for an example model.
.structures (ThngDocument)

.devices (NestModelDevicesDocument)
{
"type": "object",
"description": "Object representing the device connector model with the Nest API.",
"properties": {
"structures": { "$ref": "ThngDocument" },
"devices": { "$ref": "NestModelDevicesDocument" }
}
}See also: NestModelDevicesDocument, ThngDocument
NestModelDevicesDocument Data Model
.thermostats (ThngDocument)

.smoke_co_alarms (ThngDocument)

.cameras (ThngDocument)
{
"type": "object",
"description": "The device structures for Nest thermostats, smoke alarms, and cameras.",
"properties": {
"thermostats": { "$ref": "ThngDocument" },
"smoke_co_alarms": { "$ref": "ThngDocument" },
"cameras": { "$ref": "ThngDocument" }
}
}See also: ThngDocument
Nest Model Example
The following example is the complete model that can be obtained by specifying model as 'default' upon creation of a Nest connector.
{
  "structures": {
    "tags": [
      "Nest",
      "Nest-structure"
    ],
    "name": "{name}",
    "description": "{name}",
    "properties": {
      "away": "{away}",
      "time_zone": "{time_zone}",
      "country_code": "{country_code}",
      "postal_code": "{postal_code}",
      "rhr_enrollment": "{rhr_enrollment}",
      "peak_period_start_time": "{peak_period_start_time}",
      "peak_period_end_time": "{peak_period_end_time}",
      "eta": "{eta}"
    },
    "actions": [
      "_nestUpdate"
    ]
  },
  "devices": {
    "thermostats": {
      "tags": [
        "Nest",
        "Nest-thermostat"
      ],
      "name": "{name}",
      "description": "{name_long}",
      "properties": {
        "locale": "{locale}",
        "device_id": "{device_id}",
        "software_version": "{software_version}",
        "structure_id": "{structure_id}",
        "last_connection": "{last_connection}",
        "is_online": "{is_online}",
        "can_cool": "{can_cool}",
        "can_heat": "{can_heat}",
        "is_using_emergency_heat": "{is_using_emergency_heat}",
        "has_fan": "{has_fan}",
        "fan_timer_active": "{fan_timer_active}",
        "fan_timer_timeout": "{fan_timer_timeout}",
        "has_leaf": "{has_leaf}",
        "temperature_scale": "{temperature_scale}",
        "target_temperature_f": "{target_temperature_f}",
        "target_temperature_c": "{target_temperature_c}",
        "target_temperature_high_f": "{target_temperature_high_f}",
        "target_temperature_high_c": "{target_temperature_high_c}",
        "target_temperature_low_f": "{target_temperature_low_f}",
        "target_temperature_low_c": "{target_temperature_low_c}",
        "away_temperature_high_f": "{away_temperature_high_f}",
        "away_temperature_high_c": "{away_temperature_high_c}",
        "away_temperature_low_f": "{away_temperature_low_f}",
        "away_temperature_low_c": "{away_temperature_low_c}",
        "hvac_mode": "{hvac_mode}",
        "ambient_temperature_f": "{ambient_temperature_f}",
        "ambient_temperature_c": "{ambient_temperature_c}",
        "humidity": "{humidity}",
        "hvac_state": "{hvac_state}",
        "where_id": "{where_id}",
        "is_locked": "{is_locked}",
        "locked_temp_min_f": "{locked_temp_min_f}",
        "locked_temp_max_f": "{locked_temp_max_f}",
        "locked_temp_min_c": "{locked_temp_min_c}",
        "locked_temp_max_c": "{locked_temp_max_c}",
        "label": "{label}"
      },
      "actions": [
        "_nestUpdate"
      ]
    },
    "smoke_co_alarms": {
      "tags": [
        "Nest",
        "Nest-protect"
      ],
      "name": "{name}",
      "description": "{name_long}",
      "properties": {
        "locale": "{locale}",
        "software_version": "{software_version}",
        "structure_id": "{structure_id}",
        "last_connection": "{last_connection}",
        "is_online": "{is_online}",
        "battery_health": "{battery_health}",
        "co_alarm_state": "{co_alarm_state}",
        "smoke_alarm_state": "{smoke_alarm_state}",
        "is_manual_test_active": "{is_manual_test_active}",
        "last_manual_test_time": "{last_manual_test_time}",
        "ui_color_state": "{ui_color_state}",
        "where_id": "{where_id}"
      },
      "actions": [
        "_nestUpdate"
      ]
    },
    "cameras": {
      "tags": [
        "Nest",
        "Nest-cam"
      ],
      "name": "{name}",
      "description": "{name_long}",
      "properties": {
        "software_version": "{software_version}",
        "structure_id": "{structure_id}",
        "where_id": "{where_id}",
        "is_online": "{is_online}",
        "is_streaming": "{is_streaming}",
        "is_audio_input_enabled": "{is_audio_input_enabled}",
        "last_is_online_change": "{last_is_online_change}",
        "is_video_history_enabled": "{is_video_history_enabled}",
        "web_url": "{web_url}",
        "app_url": "{app_url}",
        "is_public_share_enabled": "{is_public_share_enabled}",
        "activity_zones": "{activity_zones}",
        "public_share_url": "{public_share_url}",
        "snapshot_url": "{snapshot_url}",
        "last_event": "{last_event}"
      },
      "actions": [
        "_nestUpdate"
      ]
    }
  }
}
Setting Up Authentication with Nest
In order to create the Nest connector you will need to create a Nest Product in your Nest developer account and configure the 'Redirect URI' as:
https://api.evrythng.com/connectors/nest/auth/callback

Authenticate With Nest
To grant EVRYTHNG access to the user's Nest account you will need to open a browser (either a new window in your app or a WebView if your application is native) and make a call (using an Application User API key) to the authUrl provided in the connector resource. For Nest connectors, this is typically:
https://api.evrythng.com/connectors/nest/auth?access_token=$APPLICATION_USER_API_KEY
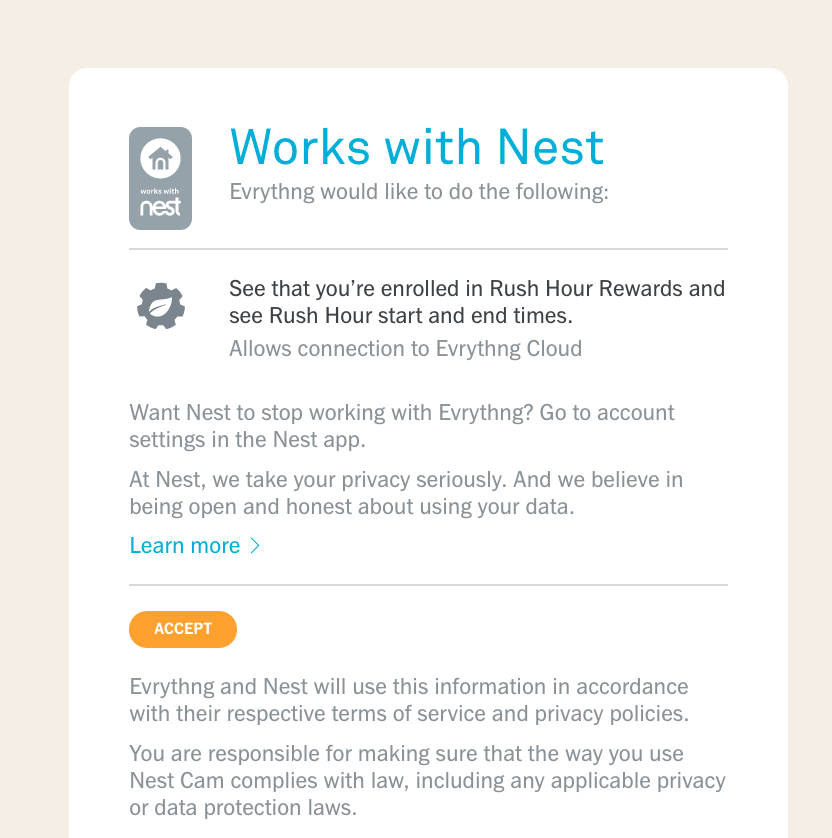
You should then see a page where Nest will ask users to confirm that they are granting access to the application:

If the access is granted and the process executed successfully, the page will be redirected to:
https://api.evrythng.com/connectors/nest/auth/result.html?status=ok
Otherwise it will be an error status:
https://api.evrythng.com/connectors/nest/auth/result.html?status=err
It is the responsibility of the application to monitor the loading of this status page and bring the user back to the flow of the application. After this process has been successful, the application will find the Nest devices already imported and available in the user's EVRYTHNG account and they can be used as normal Thngs.
Remember that you must provide the correct Product ID and Product Secret when you enabled the connector (the information provided in the auth property). Otherwise the authentication with Nest will fail.
## Bi-Directional Updates
It is possible to implement bi-directional communication between Nest and EVRYTHNG using the Cloud 2 Cloud framework, specifically the Nest integration connector. This is implemented using custom action types that allow Cloud 2 Cloud to relay updates to device properties to the Nest API, and vice-versa to notify EVRYTHNG success or failure.
These operations are summarised below with some examples. Note that the actual IDs and properties involved will vary depending on the device and specific integration being performed.
Connector Setup
The connector model defines which properties and actions supported by Nest are known by the Nest Cloud 2 Cloud connector. The account Operator provides the Thng template that will map the properties of Nest to a Thng resource (see below for an example).
In addition to the standard Nest model, the addition of bi-directional functionality with Nest requires the following update with a PUT request to define the applicable action types for updating Nest device properties.
The property keys in the model are EVRYTHNG property names, and the values for each are placeholders for the equivalent Nest device property names.
PUT /projects/:projectId/applications/:applicationId/connectors/nest
Content-Type: application/json
Authorization: $OPERATOR_API_KEY

{
  "model": {
    "structures": {
      "tags": [
        "Nest",
        "Nest-structure"
      ],
      "name": "{name}",
      "description": "{name}",
      "product": ":productId",
      "properties": {
        "away": "{away}",
        "timezone": "{time_zone}"
      },
      "identifiers": {
        "nest_structure": "{structure_id}"
      }
    },
    "devices": {
      "thermostats": {
        "tags": [
          "Nest",
          "Nest-thermostat"
        ],
        "name": "{name}",
        "description": "{name_long}",
        "product": "{thermostat_product}",
        "properties": {
          "locale": "{locale}",
          "software_version": "{software_version}",
          "last_connection": "{last_connection}",
          "is_online": "{is_online}",
          "can_cool": "{can_cool}",
          "can_heat": "{can_heat}",
          "is_using_emergency_heat": "{is_using_emergency_heat}",
          "has_fan": "{has_fan}",
          "fan_timer_active": "{fan_timer_active}",
          "fan_timer_timeout": "{fan_timer_timeout}",
          "has_leaf": "{has_leaf}",
          "temperature_scale": "{temperature_scale}",
          "target_temperature_f": "{target_temperature_f}",
          "target_temperature_c": "{target_temperature_c}",
          "target_temperature_high_f": "{target_temperature_high_f}",
          "target_temperature_high_c": "{target_temperature_high_c}",
          "target_temperature_low_f": "{target_temperature_low_f}",
          "target_temperature_low_c": "{target_temperature_low_c}",
          "away_temperature_high_f": "{away_temperature_high_f}",
          "away_temperature_high_c": "{away_temperature_high_c}",
          "away_temperature_low_f": "{away_temperature_low_f}",
          "away_temperature_low_c": "{away_temperature_low_c}",
          "hvac_mode": "{hvac_mode}",
          "ambient_temperature_f": "{ambient_temperature_f}",
          "ambient_temperature_c": "{ambient_temperature_c}",
          "humidity": "{humidity}",
          "hvac_state": "{hvac_state}",
          "where_id": "{where_id}"
        },
        "actions": [
          "_nestUpdate"
        ],
        "identifiers": {
          "device_id": "{device_id}"
        }
      }
    }
  }
}
Custom action types are used to send updates to the third party cloud. In the Nest case, this is _nestUpdate. The corresponding action type _nestUpdateDone is used to create actions to represent the third party cloud acknowledging the request. In some cases this will be an immediate response, but allows for the update to take some length of time.
Poll or subscribe through MQTT to these for the response data from the Nest side. The responses will contain the keys results and error in their customFields, which will contain values describing the outcome of the operation depending on whether success is true or false. See below for examples.
### Updating Nest Properties
The _nestUpdate action type is used to communicate device property changes to the Nest API. Actions of this type must contain customFields.payload detailing the device property key and new value. An example is shown below for the away property, but any of the writable properties in the Nest connector model can be updated in this way.
POST /thngs/:deviceThngId/actions/_nestUpdate
Content-Type: application/json
Authorization: $APPLICATION_USER_API_KEY

{
  "type": "_nestUpdate",
  "customFields": {
    "payload": {
      "key": "away",
      "value": "home"
    }
  }
}
This will result in the asynchronous creation of an _nestUpdateDone action by Nest when the device property update has completed, including the ID of the original update request action.
{
  "id": "UnDaM3C4qttBY8waa7mM7Msd",
  "createdAt": 1516292442836,
  "customFields": {
    "requestId": "UHDaMmfHMt9BE8wRaNGqrq8a",
    "success": true,
    "result": {},
    "error": {}
  },
  "timestamp": 1516292442836,
  "type": "_nestUpdateDone",
  "user": "UnXw5APyqt9eEPwaaN3qNMhk",
  "location": {},
  "locationSource": "unknown",
  "createdByProject": "U4gwpAWnqQQehPwawNmM7qXm",
  "createdByApp": "U4DwpUgRqtQVEswRar3M7qgs",
  "thng": "UnXwqfNHqQQBh8wRwrm6NqHe"
}
{
"id": "UnDaM3C4qttBY8waa7mM7Msd",
"createdAt": 1516292442836,
"customFields": {
"error": {
"details": {
"fields": "away"
},
"error": "No write permission(s) for field(s): away",
"instance": "82fd1e0f-acad-4e20-b436-06da890307fa",
"message": "No write permission(s) for field(s): away",
"type": "https://developer.nest.com/documentation/cloud/error-messages#no-write-permission"
},
"requestId": "UHDaMmfHMt9BE8wRaNGqrq8a",
"success": false
},
"timestamp": 1516292442836,
"type": "_nestUpdateDone",
"user": "UnXw5APyqt9eEPwaaN3qNMhk",
"location": {},
"locationSource": "unknown",
"createdByProject": "U4gwpAWnqQQehPwawNmM7qXm",
"createdByApp": "U4DwpUgRqtQVEswRar3M7qgs",
"thng": "UnXwqfNHqQQBh8wRwrm6NqHe"
}Testing the Integration
It is possible to test the Nest integration with EVRYTHNG without any physical devices available by sending updates for the Nest Structure API. The steps required to perform this test are shown here:
- In the EVRYTHNG Dashboard (or through the API) create a project and application.
- Create an Application User in that application and note the Application User API Key.
- Log in (or sign up) to the Nest Developer site and create a new Nest Product with the following permissions to request from the user - 'Away' read/write, 'Structure' read/write. Note the Product ID and Product Secret from the resulting Product page.
- Via the EVRYTHNG API, create a Nest Cloud 2 Cloud connector with the 'default'
modelto enable the Nest integration. Use the noted Product ID and Product Secret as theauthcredentials when creating the connector. - Authenticate the connection to Nest using the noted Application User API Key.
- Log in (or sign up) to Nest Home and create a Structure to represent the home.
- In the EVRYTHNG Dashboard, verify that a new Thng has been created to represent the Nest Structure. This should have the 'Nest' and 'Nest-structure'
tags, and include initial metadata andpropertiesfrom the Nest API. This demonstrates that the connector is receiving data from Nest. - Test the bi-directional connection with Nest by performing an update to the Nest Structure through the EVRYTHNG API. To do this, create an action on the Structure's Thng with the
_nestUpdateaction. In thecustomFields, add apayloadincluding thekeyandvalueof the Nest property to update. An example is shown above. - Verify the update worked through the Nest Home console, the EVRYTHNG Dashboard, and the existence of a new
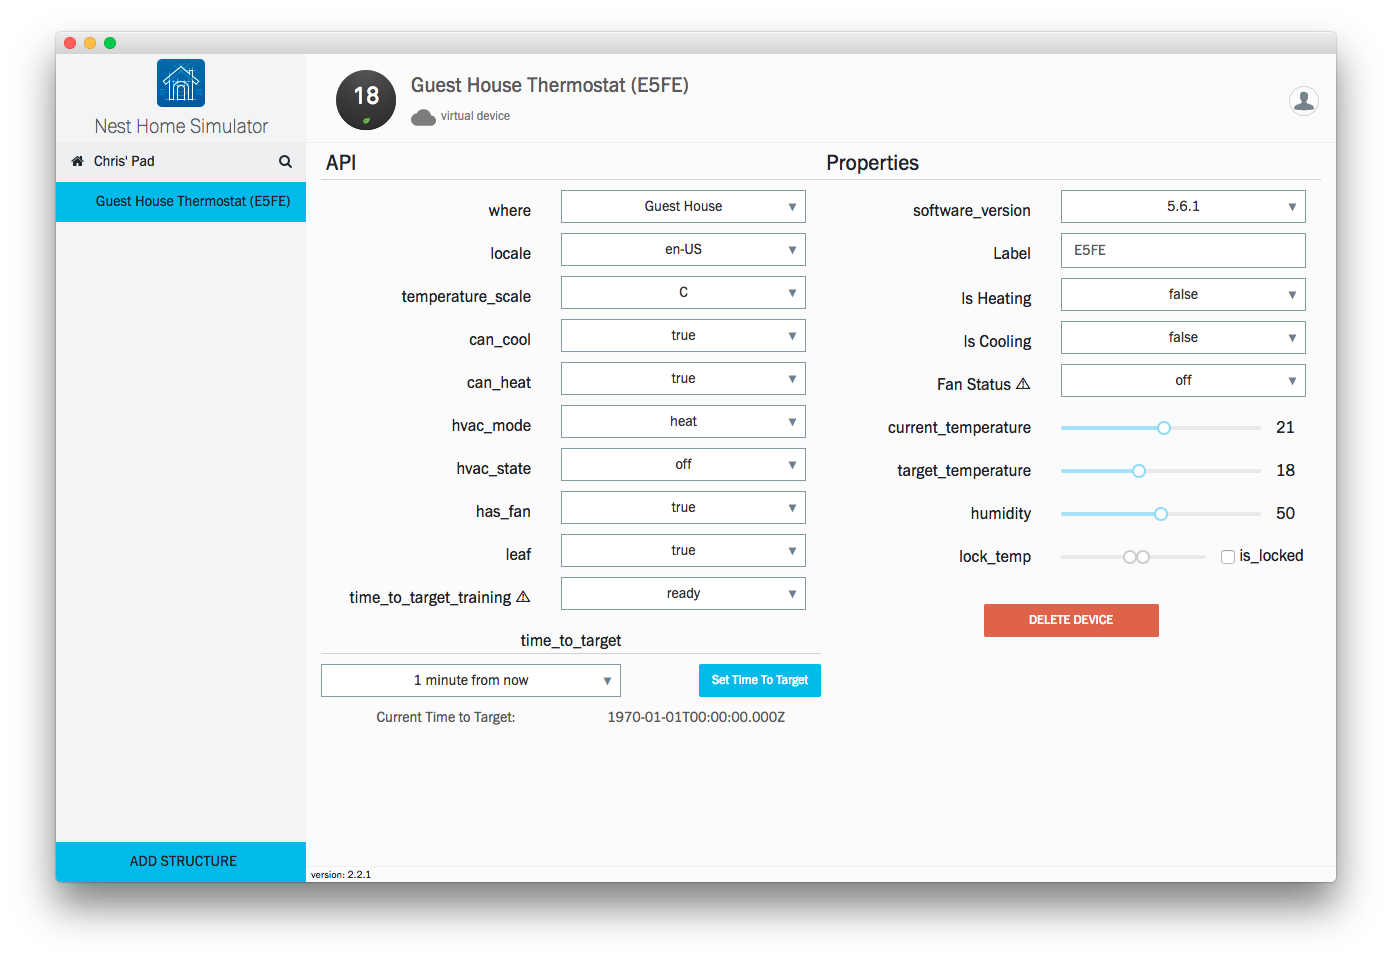
_nestUpdateDoneaction containing the result. ThecustomFields.successvalue should betrue. - If you have any Nest devices added to your account, you will also see Thngs created that represent these devices. Change some settings (such as temperature target) and observe the updated properties in the EVRYTHNG Dashboard. If not, you can also use the Nest Home Simulator as an equivalent replacement.

Updated 7 months ago
